One of my favorite trips I’ve been lucky enough to go on during 2020 was our recent road trip through Utah. The main purpose of our trip was to visit Arches and Canyonlands National Parks both of which are located near Moab. In addition to these two parks, Utah is home to three other national parks however they are further south so we were not able to fit them in during this visit. They say the best times to visit the parks are during Spring or Autumn because the temperatures aren’t too high and there usually is not snow or rain yet. I personally have not had the best luck this year when it comes to the weather cooperating. The week before we left it was about 70 degrees however the week we went, there was both rain and snow in the forecast with the warmest days having a high of 45 degrees. Due to covid, we decided to rent a car and drive from Portland instead of flying into Salt Lake or Moab and going from there. Since we planned to visit two national parks over the span of four days, it made the most sense to purchase an annual National Park pass ahead of time instead of paying for a day pass each day. Although we mainly came to experience Arches and Canyonlands, we also discovered some other amazing places nearby all of which are outlined below. I also include the AllTrails links below if you would like more information about each hike!

Arches National Park
Park Avenue Trail
We arrived in Moab on Sunday afternoon after driving about 4 hours from Salt Lake. When we first got into the park, we headed straight for the Park Avenue Trail to stretch our legs and finally get to see this gorgeous place. Park Avenue Trail is right up the winding road from the Visitor Center so it is really easy to find. This trail is described as a 1.8 miles out and back trail though we were unable to complete the whole thing due to the weather. About partway through, the wind started to really pick up which caused the red, really fine sand to blow straight into our faces and eyes. It then started to rain pretty hard as well so we had to turn back. If you are looking for a short hike, I would recommend this one It is great for seeing the amazing rock formations however there were no arches along this hike.
You can view the AllTrails page for this hike here


Delicate Arch


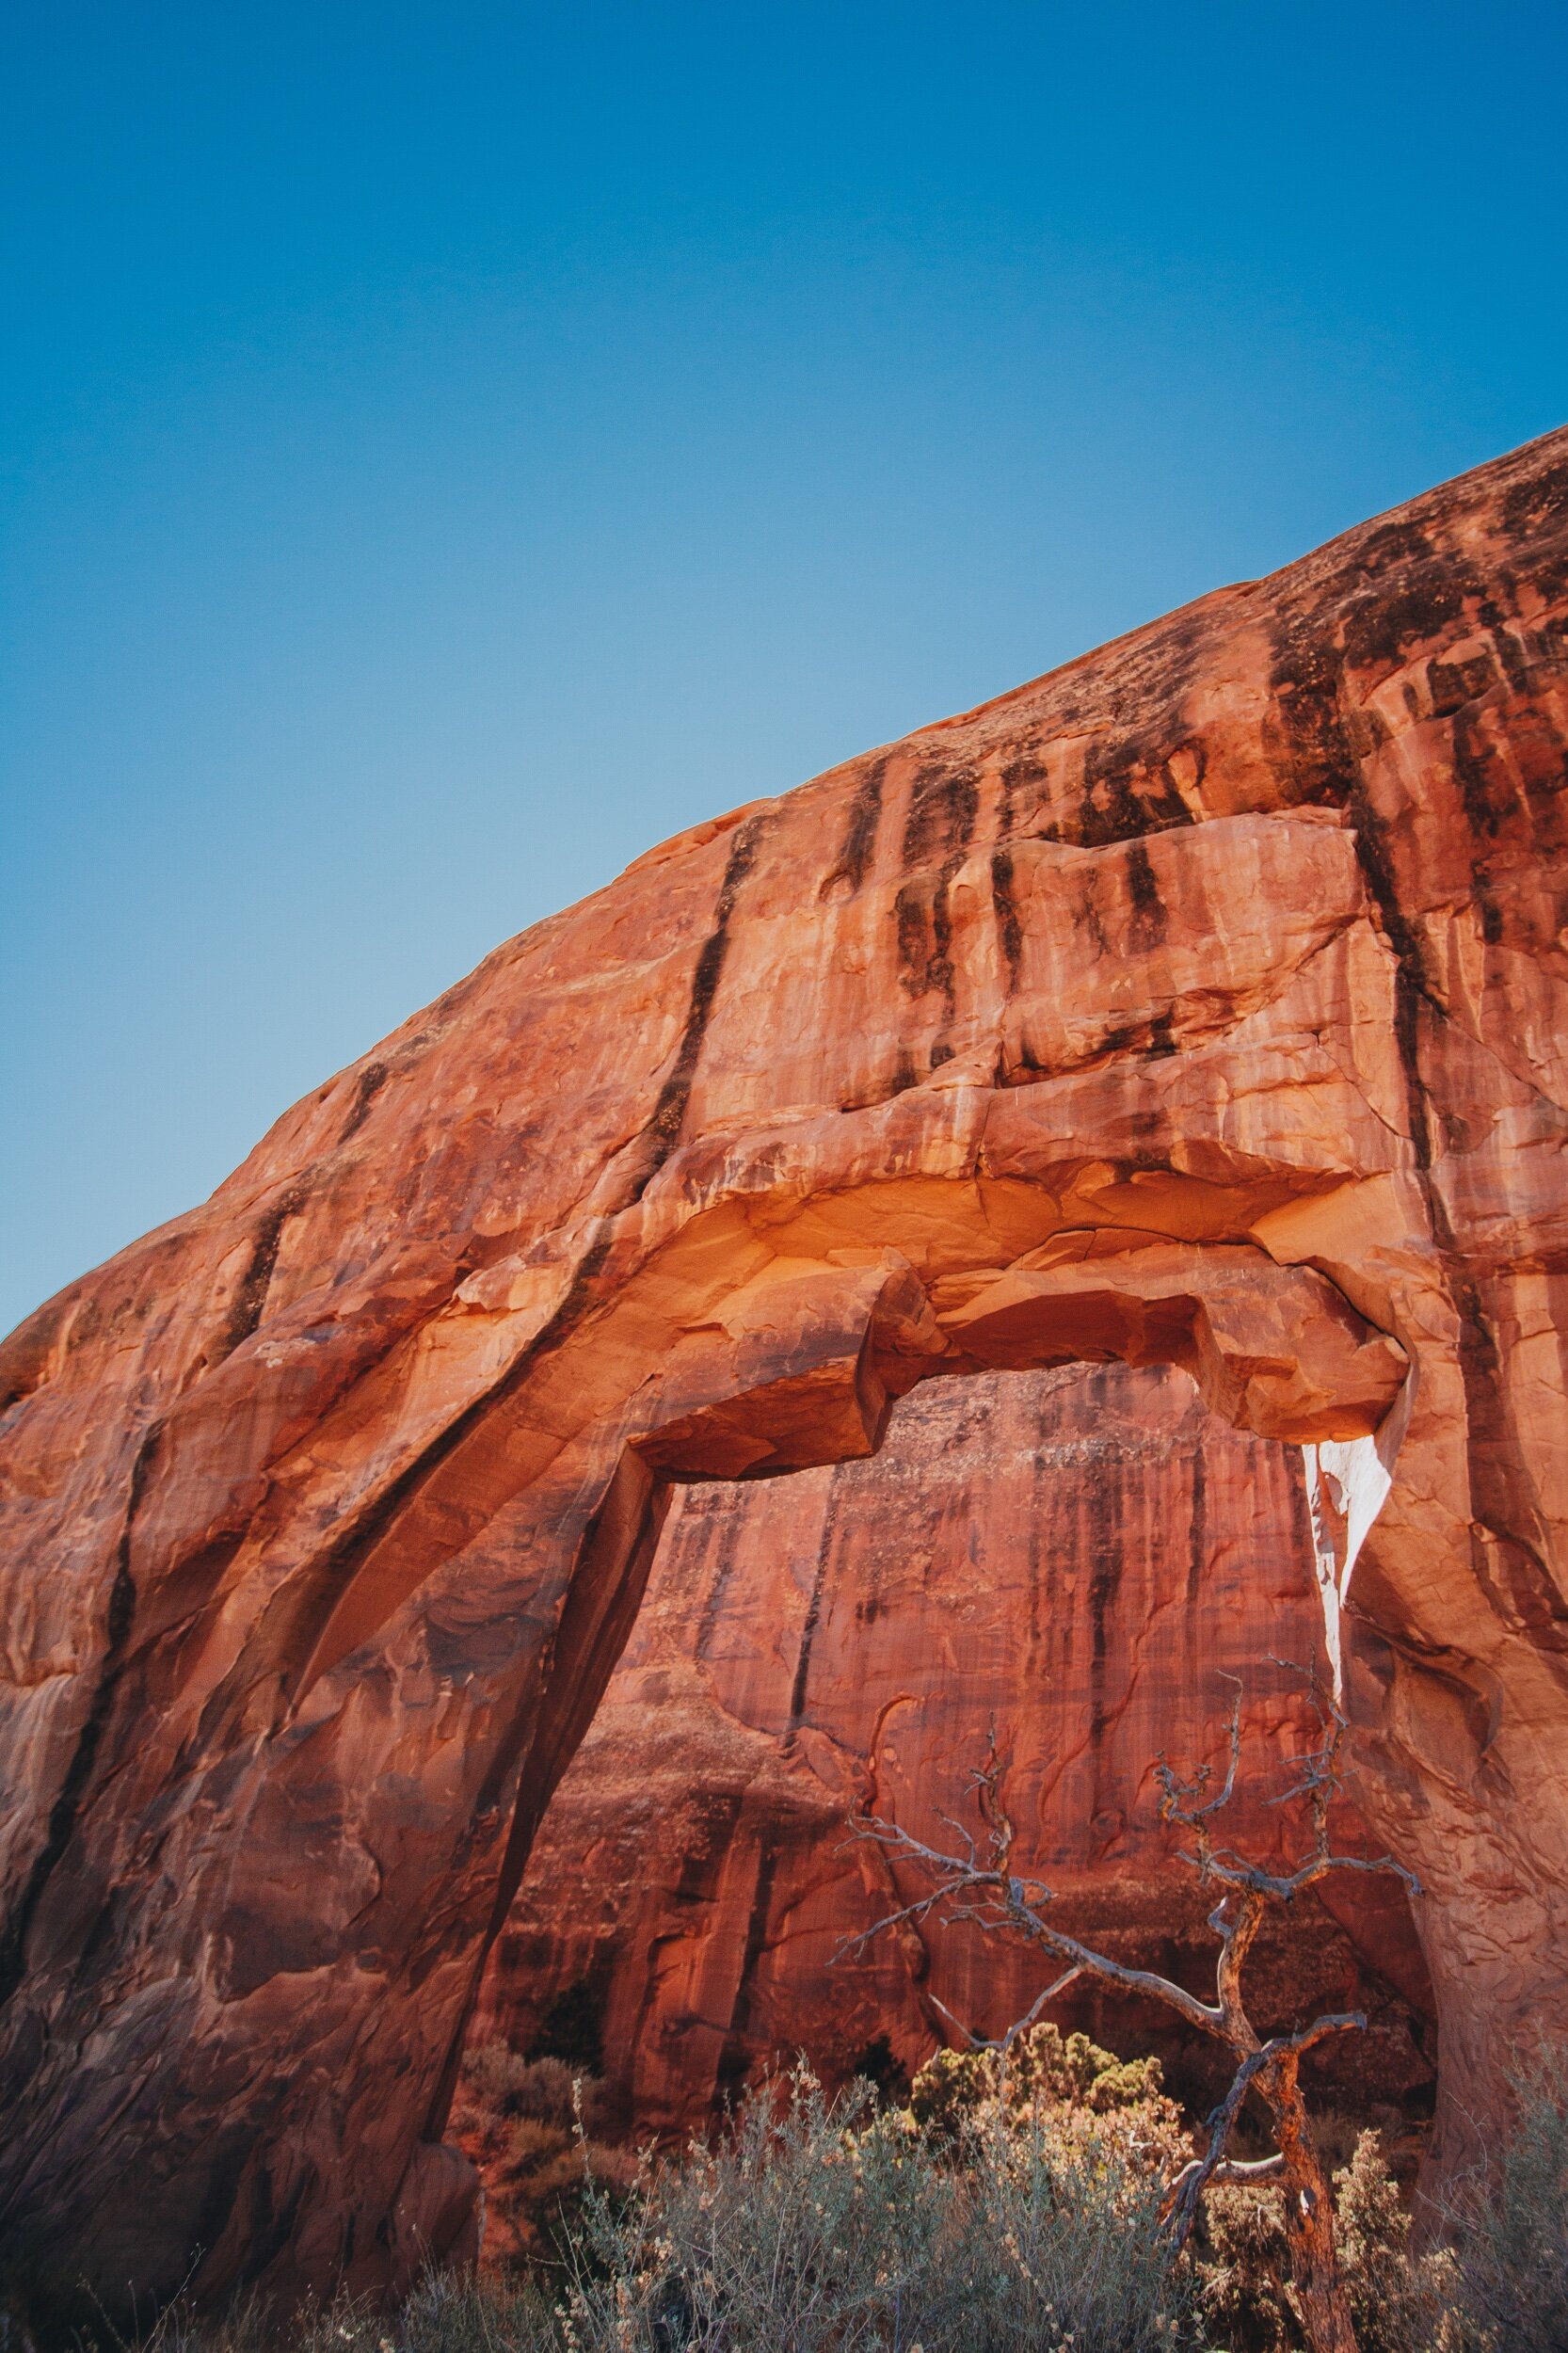
When you think of Arches National Park or even just look at a Utah license plate, this is the iconic arch. The hike to see Delicate Arch is about 3 miles total but is primarily uphill so it was one of the more challenging ones we did during our whole trip. The parking lot is pretty large and has a bathroom near the trailhead however you can expect it to be busy no matter what day you go! Near the beginning of the hike, there is an optional detour to view some ancient petroglyphs. The detour is a pretty short trail so definitely worth it in my opinion! That path then reconnects with the main trail where the rest of the hike is mainly uphill.
The interesting thing about the hikes in Arches is that there’s rarely a distinct trail or path. Most times you are just walking across rock so it can be easy to lose the trail though this does make it easier to maintain a 6ft distance from other groups. Once you get to the “end” of the hike, you’ll come to a wide-open space with the Delicate Arch standing slightly below you in the distance. Before seeing it in person, I thought the arch was only slightly larger than a person however it is actually 52 feet tall which becomes really apparent as you walk closer.
When looking up this arch before the trip, I found a post on Instagram explaining an alternative angle of the arch. As expected, there are usually many people milling around the base of the arch though everyone was respectful when it came to taking turns getting photos. If you are interested in seeing the arch from that second viewpoint, you can get there by climbing through the small arch (as shown in my photo). Near the end of the hike, you’ll see this smaller arch to your upper right. While it is a bit steep, if you climb up and through the arch, you can get a good view of Delicate Arch in the background; this is where I took the photo in the yellow dress.
You can view the AllTrails page for this hike here

View from the smaller arch looking back at the main trail

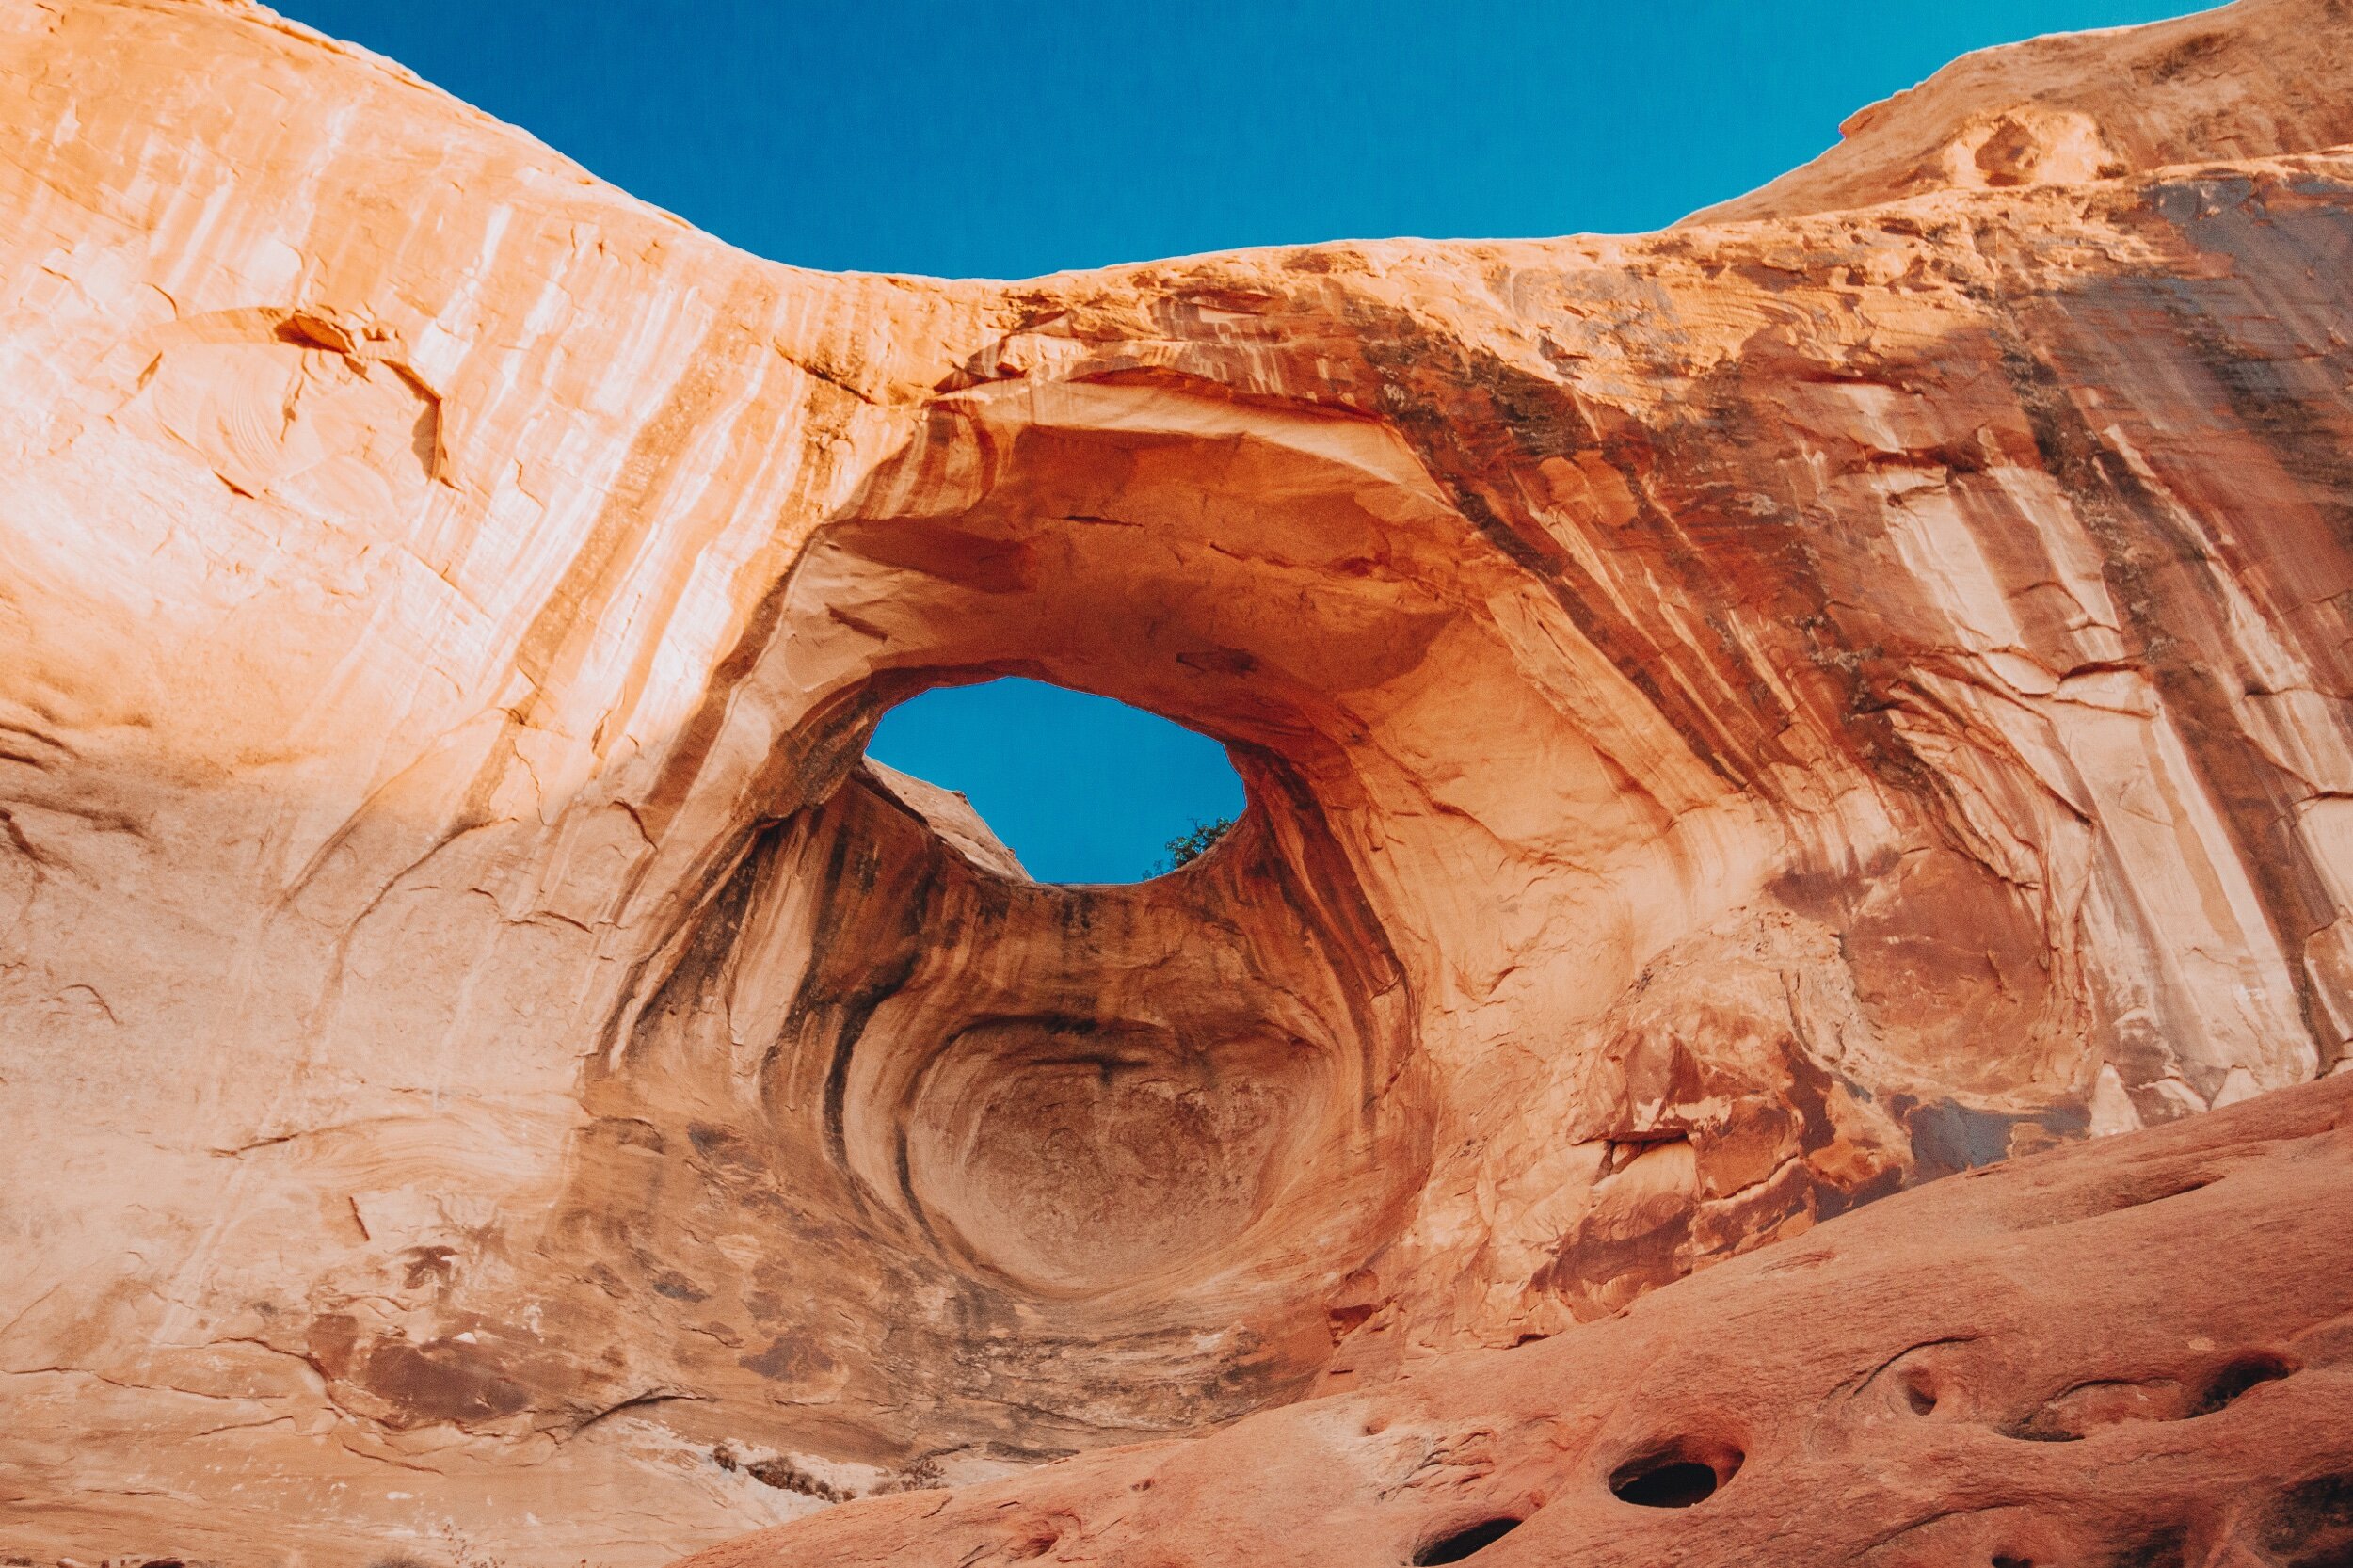
Windows Loop and Turret Arch Trail (North Window, South Window and Turret Arch)

The North and South Windows when looking through Turret Arch
On our last day in Arches, we spent the morning seeing a few more famous sites. Both The Windows and Double Arch are really close to each other so if you are going to stop at one, you might as well view the other while you’re there. When you get to the trailheads, there is an upper parking lot with a bathroom and then a trail down to the lower parking lot. The Windows trail starts in the upper parking lot and the Double Arch trailhead starts from the lower.
There are a few different ways you can go from the parking lot depending on whether you would like to see the North Window first or Turret Arch first; from what I remember, they were both relatively flat. We took the path on the left leading us to the North Window. If you continue straight on the path, it will lead you around the corner to the South Window. At first, we thought the “South Window” was just the North Window from the other side however there truly are two windows next to each other as seen in the photo above. Across the way from the two windows is Turret Arch. In order to get up into any of the arches, you need to climb up. Since there was still some snow and ice on the ground, climbing up to Turret Arch was a little slippery and I recommend having both hands free.
You can view the AllTrails page for this hike here

North Window

South Window

Turret Arch
Double Arch


Another one of the famous arches in the park is Double Arch. From the lower parking lot, you can walk the 0.6 mile out and back trail to get close and even climb under the arch. This one was really cool since it is unlike any of the other arches we saw during our entire trip. While there is the opinion to climb up and view the landscape behind the arches, I personally didn’t do it. In the short time that we were there, multiple people fell trying to get back down so I’m not sure if the view was worth it or not. Overall this was a pretty short stop however it is definitely a worthwhile spot to see.
You can view the AllTrails page for this hike here
Devils Garden Loop Trail
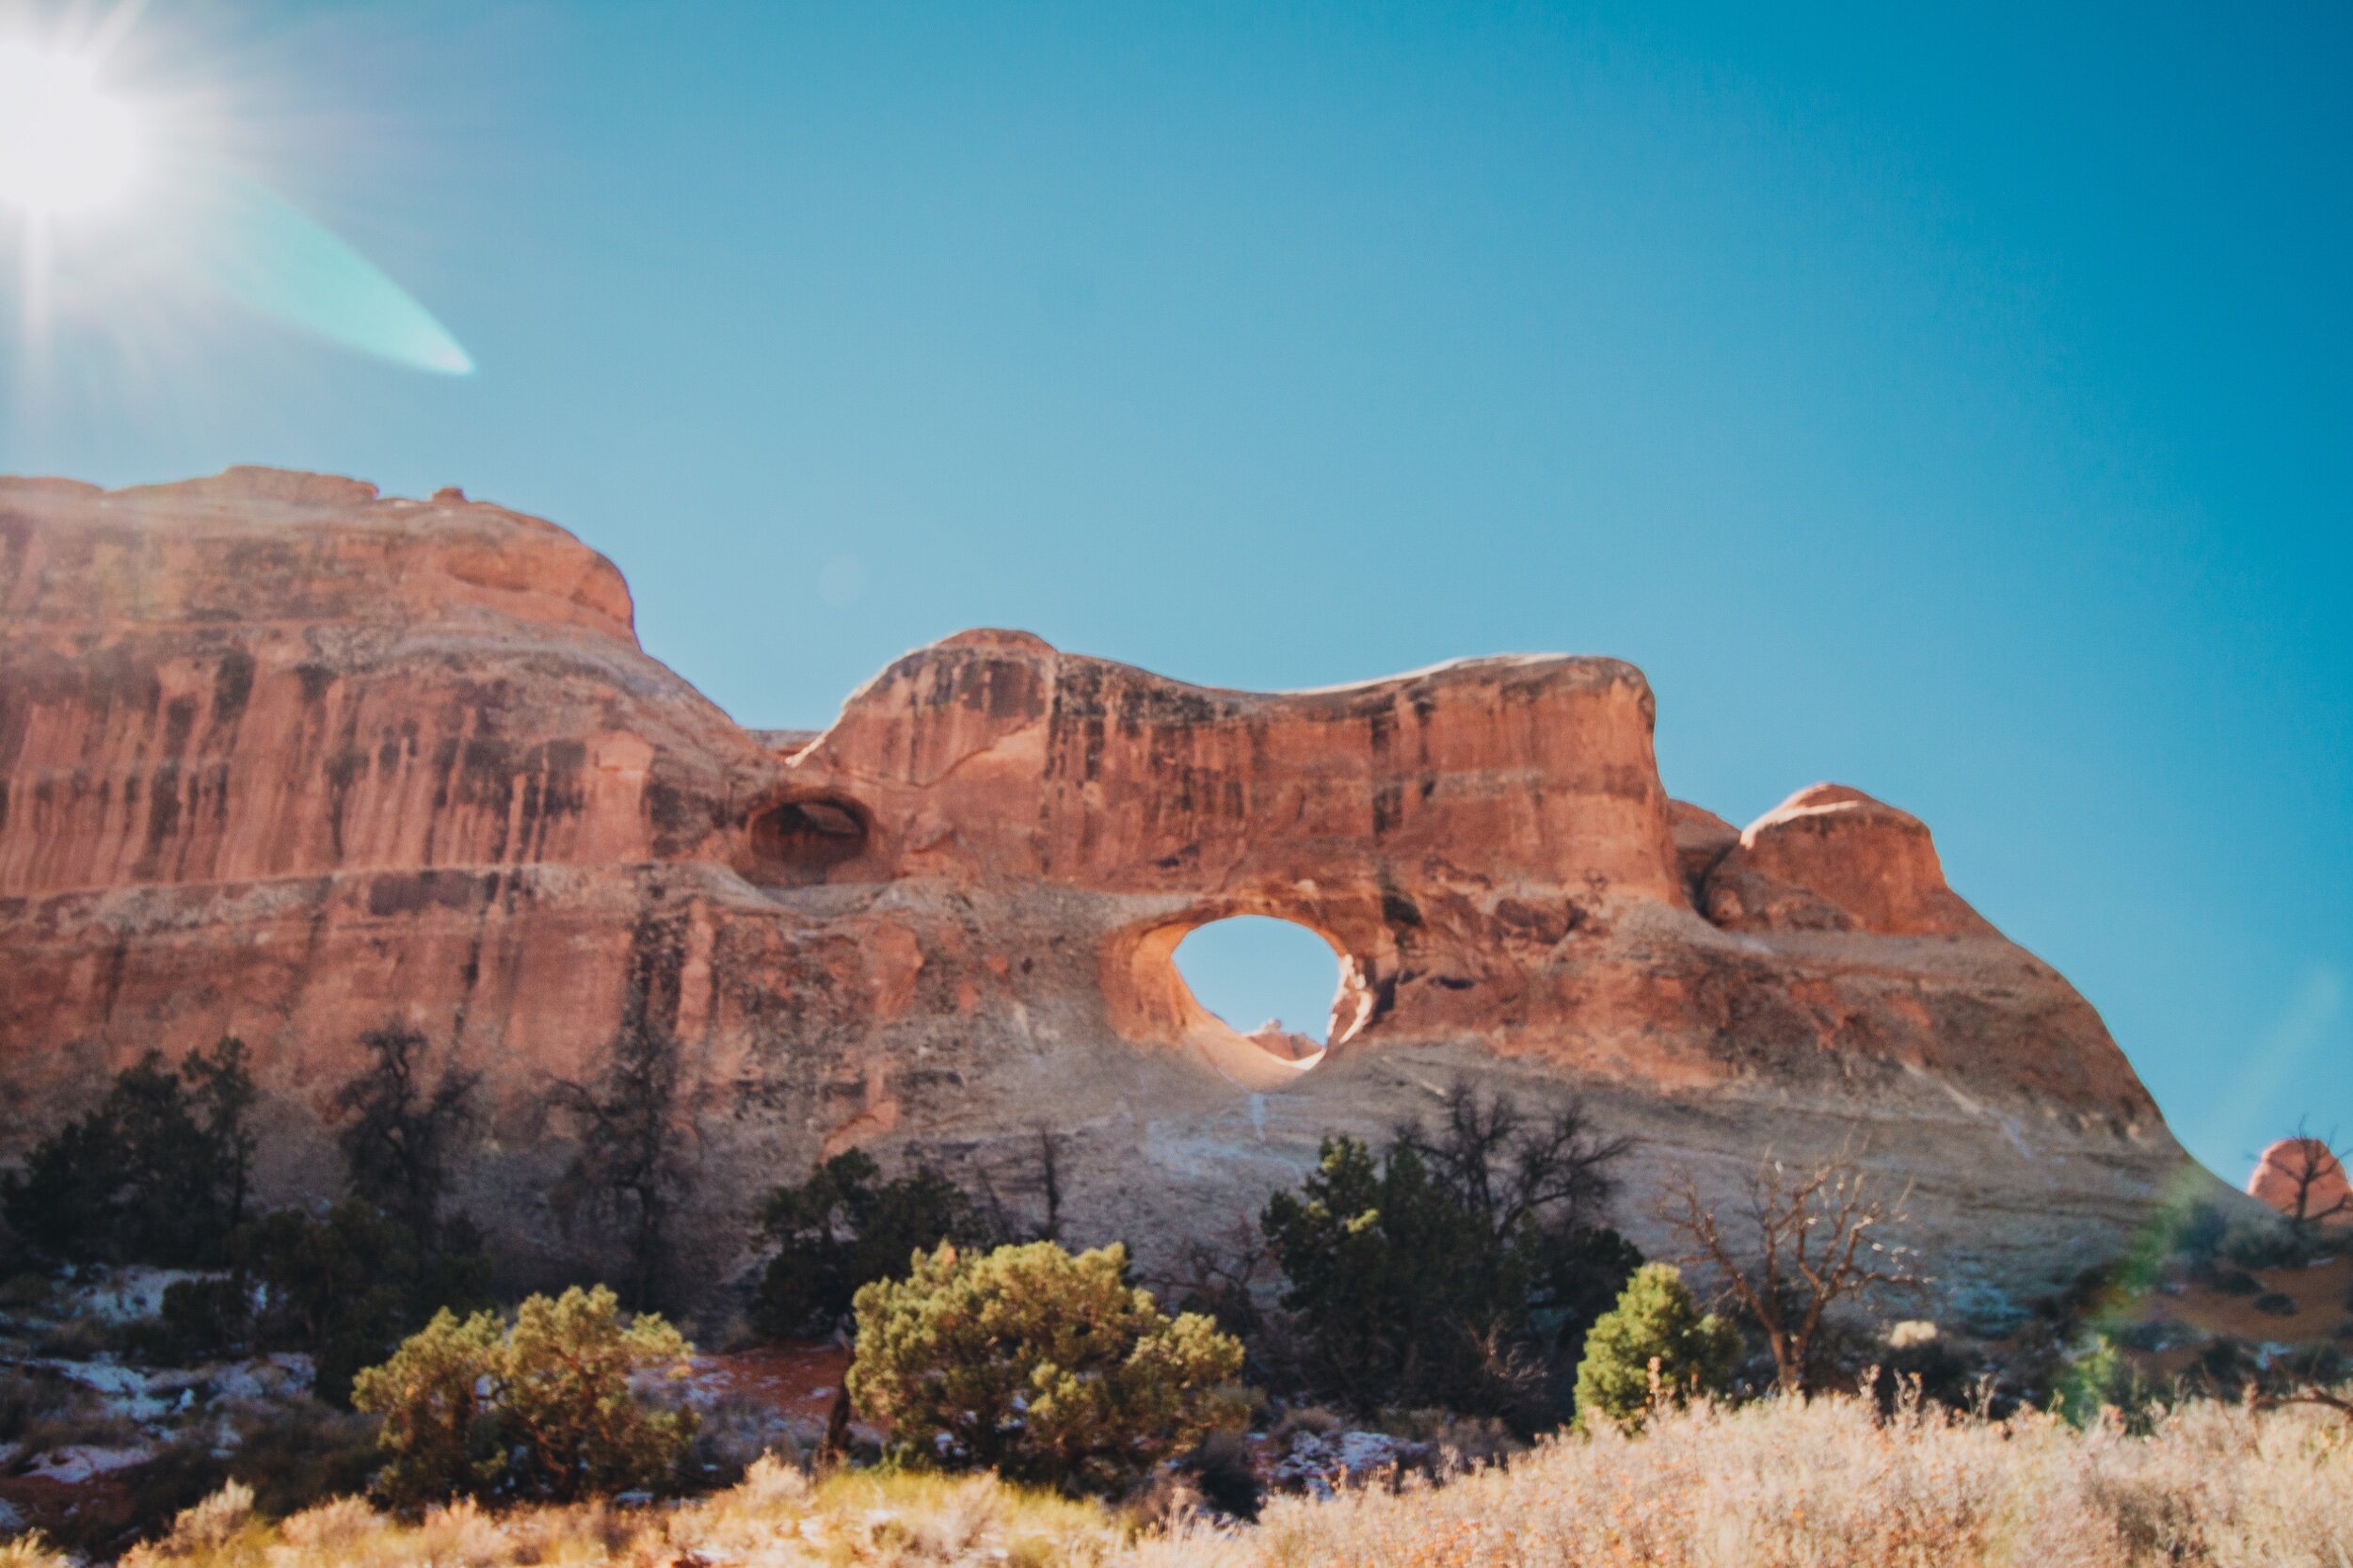
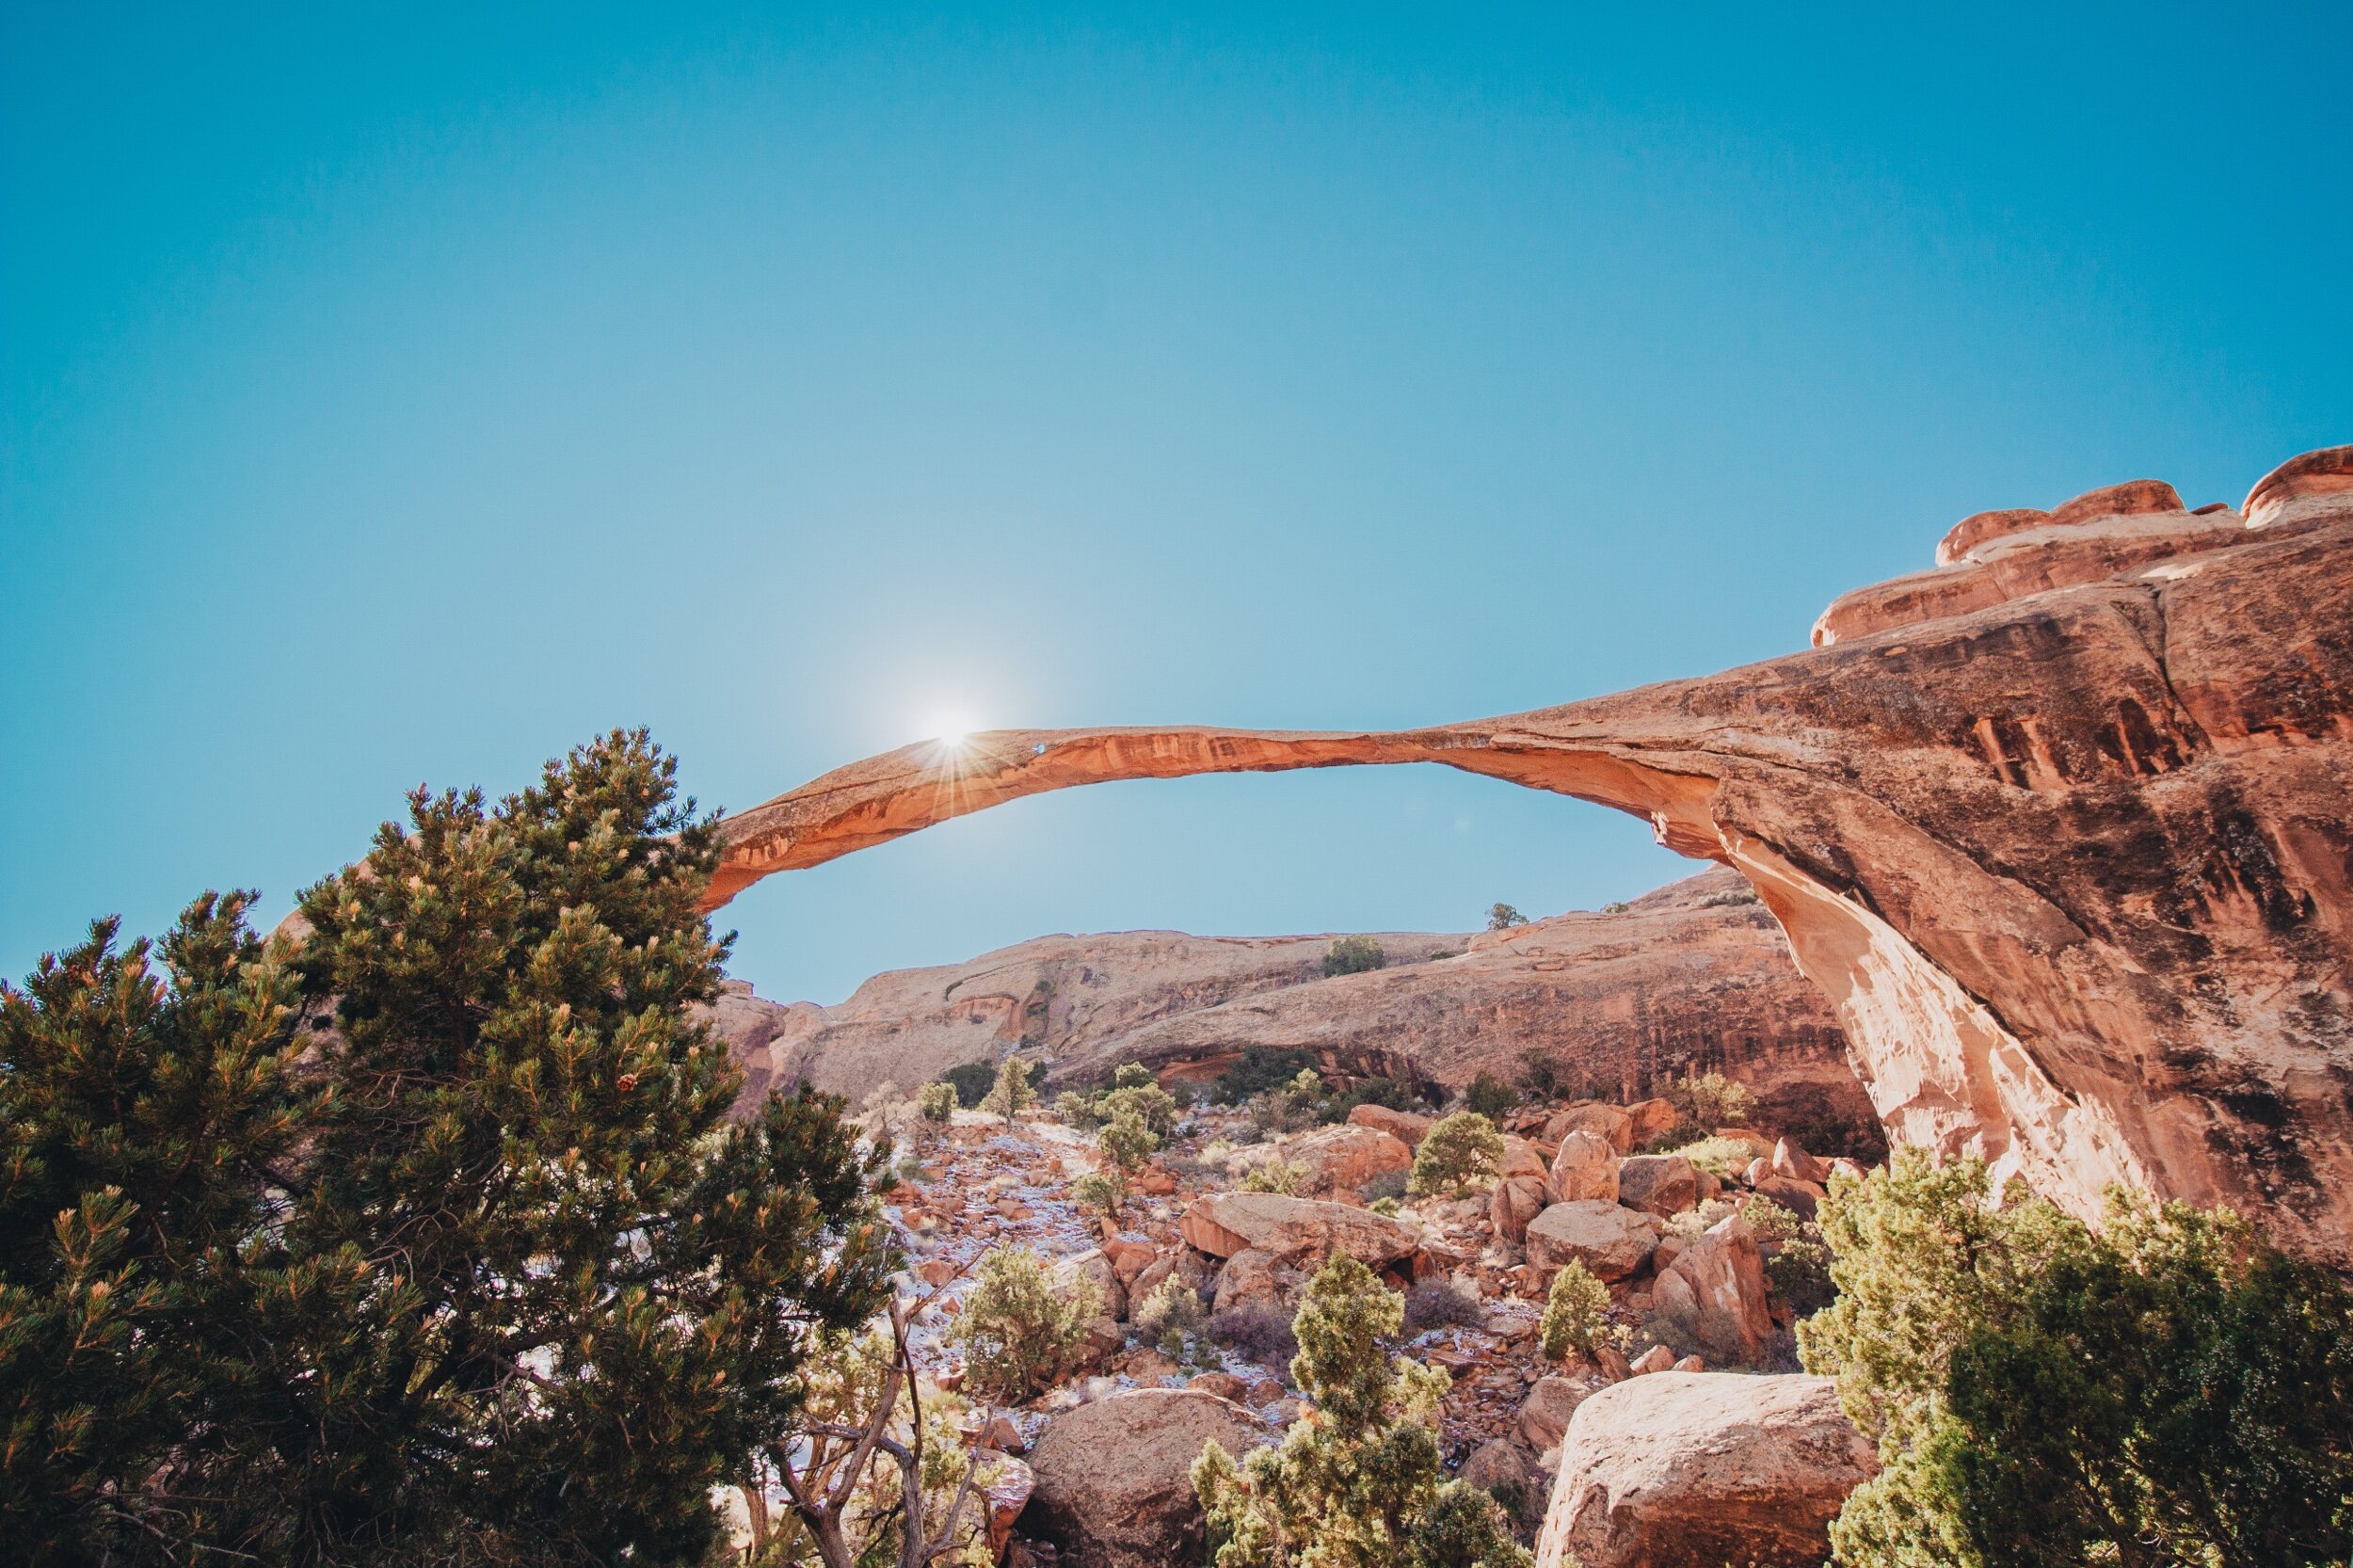
The last hike we went on before heading back to Salt Lake City was Devils Garden. If you are trying to find a hike that lets you see multiple arches at once, I suggest this one! There are a total of seven arches with trails ranging from easy to difficult and in a variety of different lengths. Since we had to make it back to Salt Lake by a certain time, we only had time for Tunnel Arch, Pine Tree Arch, Landscape Arch and then part of the Primitive Trail that leads to the Double O Arch (photos shown in order). Landscape Arch was only created back in 1991 and could fall any moment. As you can see in the third photo, it is by far the most delicate arch we saw this whole trip.
You can view the AllTrails page for this hike here
Dead Horse Point State Park

View to the East

While it isn’t a national park technically, Dead Horse Point State Park was by far one of my favorite places! It is about a 10-15 minute drive from Canyonlands and you are required to purchase a separate parking pass at the visitor center upon entry. For a day pass, it was $20 per vehicle. When looking up reviews of this place, the majority of people recommended going for sunset which I highly suggest! While there are a few viewpoints in the park, we went straight to the Dead Horse Point Overlook where you can view both sides of the park. The most famous view of this park is where the Colorado River winds through the canyons and luckily, the sun sets right behind that spot. From the other side of the overlook, you can see the moon starting to rise above the mountains and the Potash Ponds which is just as beautiful. Unfortunately, we only had time to visit this place for one evening though I would love to spend more time exploring the park when I come back!

View to the West
Moab, Utah
Mills Creek Trail
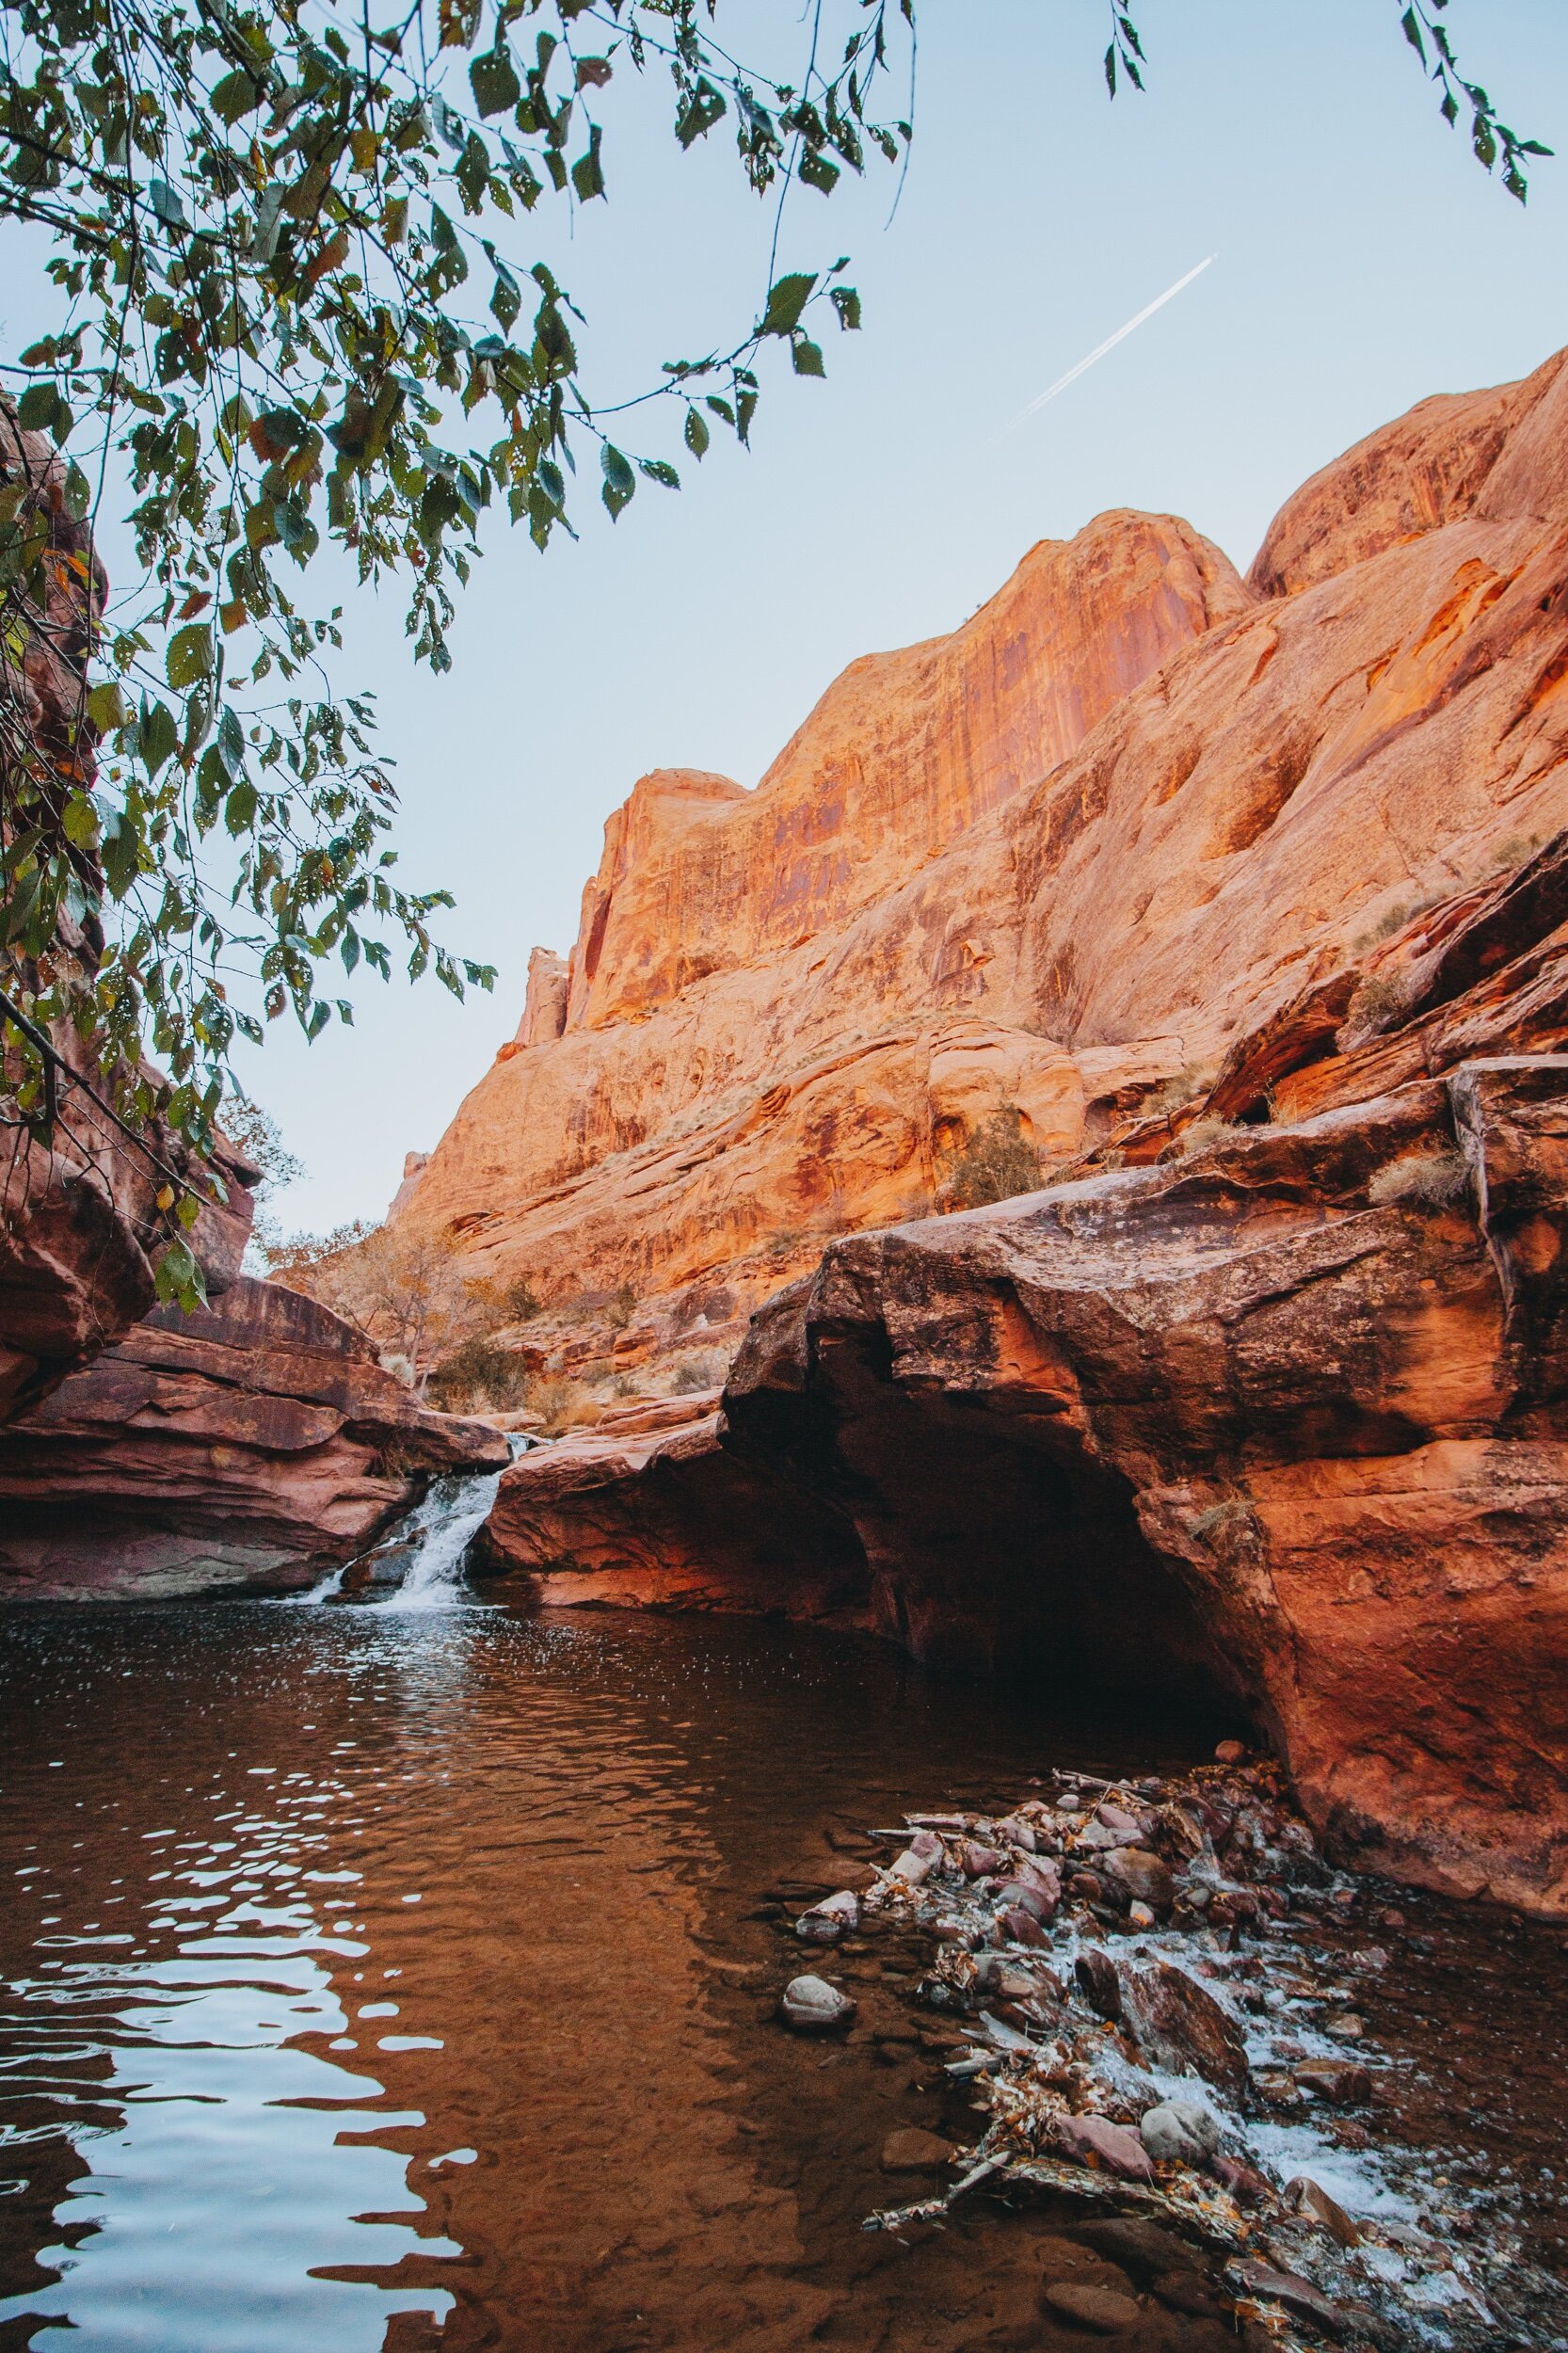

In addition to spending time in the National Parks, we got a few chances to explore Moab as well. One morning, we did the Mills Creek Trail which was about a 10-minute drive from our Airbnb and from downtown Moab. Since we went on a weekday morning, the trail was pretty empty and we only saw about five other people.
Near the parking lot, you’ll come across a larger waterfall however you will want to keep walking as that is not the main falls. Like many trails from our trip, it can get confusing to figure out where the trail is. This hike was one of the more confusing ones and we found ourselves crossing the river multiple times trying to find the correct path. One of the other groups we ran into had climbed up to the left which apparently leads to an alternative view of the waterfall from above. Compared to Oregon waterfalls, the waterfall was not super impressive however we hadn’t come across any other waterfalls our whole trip so I am happy we were able to fit this short hike in.
You can view the AllTrails page for this hike here
Corona and Bow Tie Arch
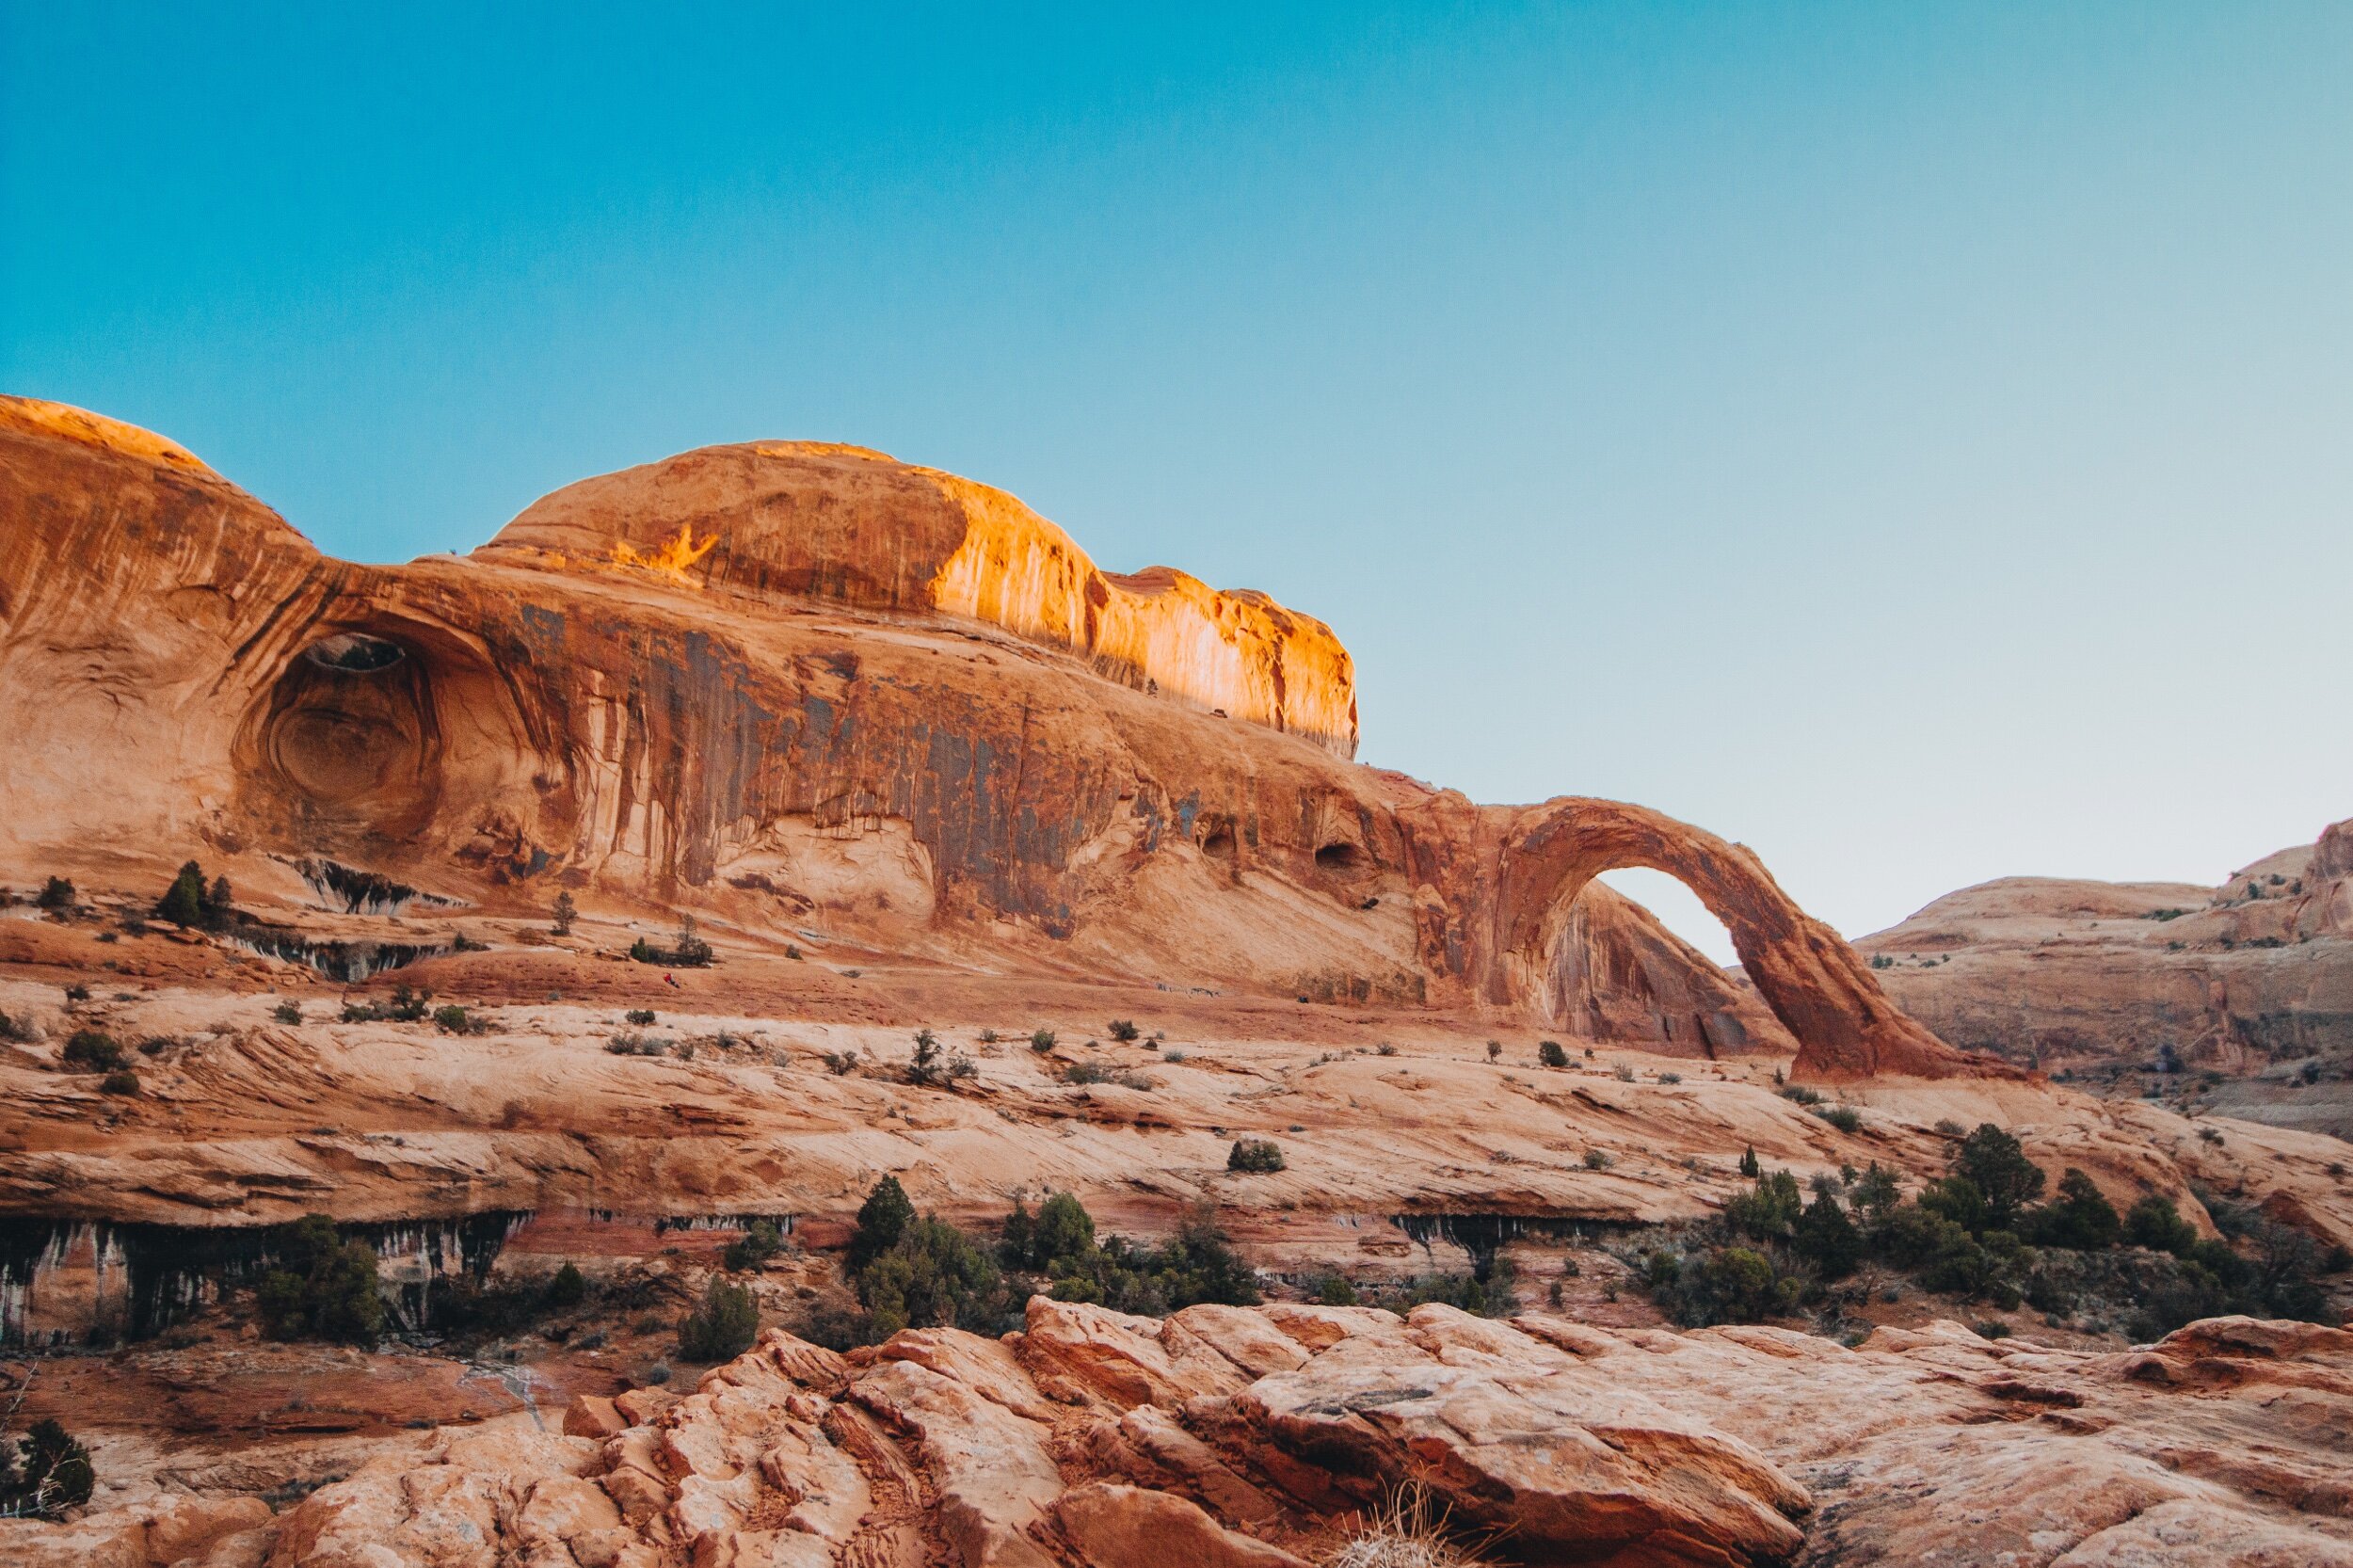
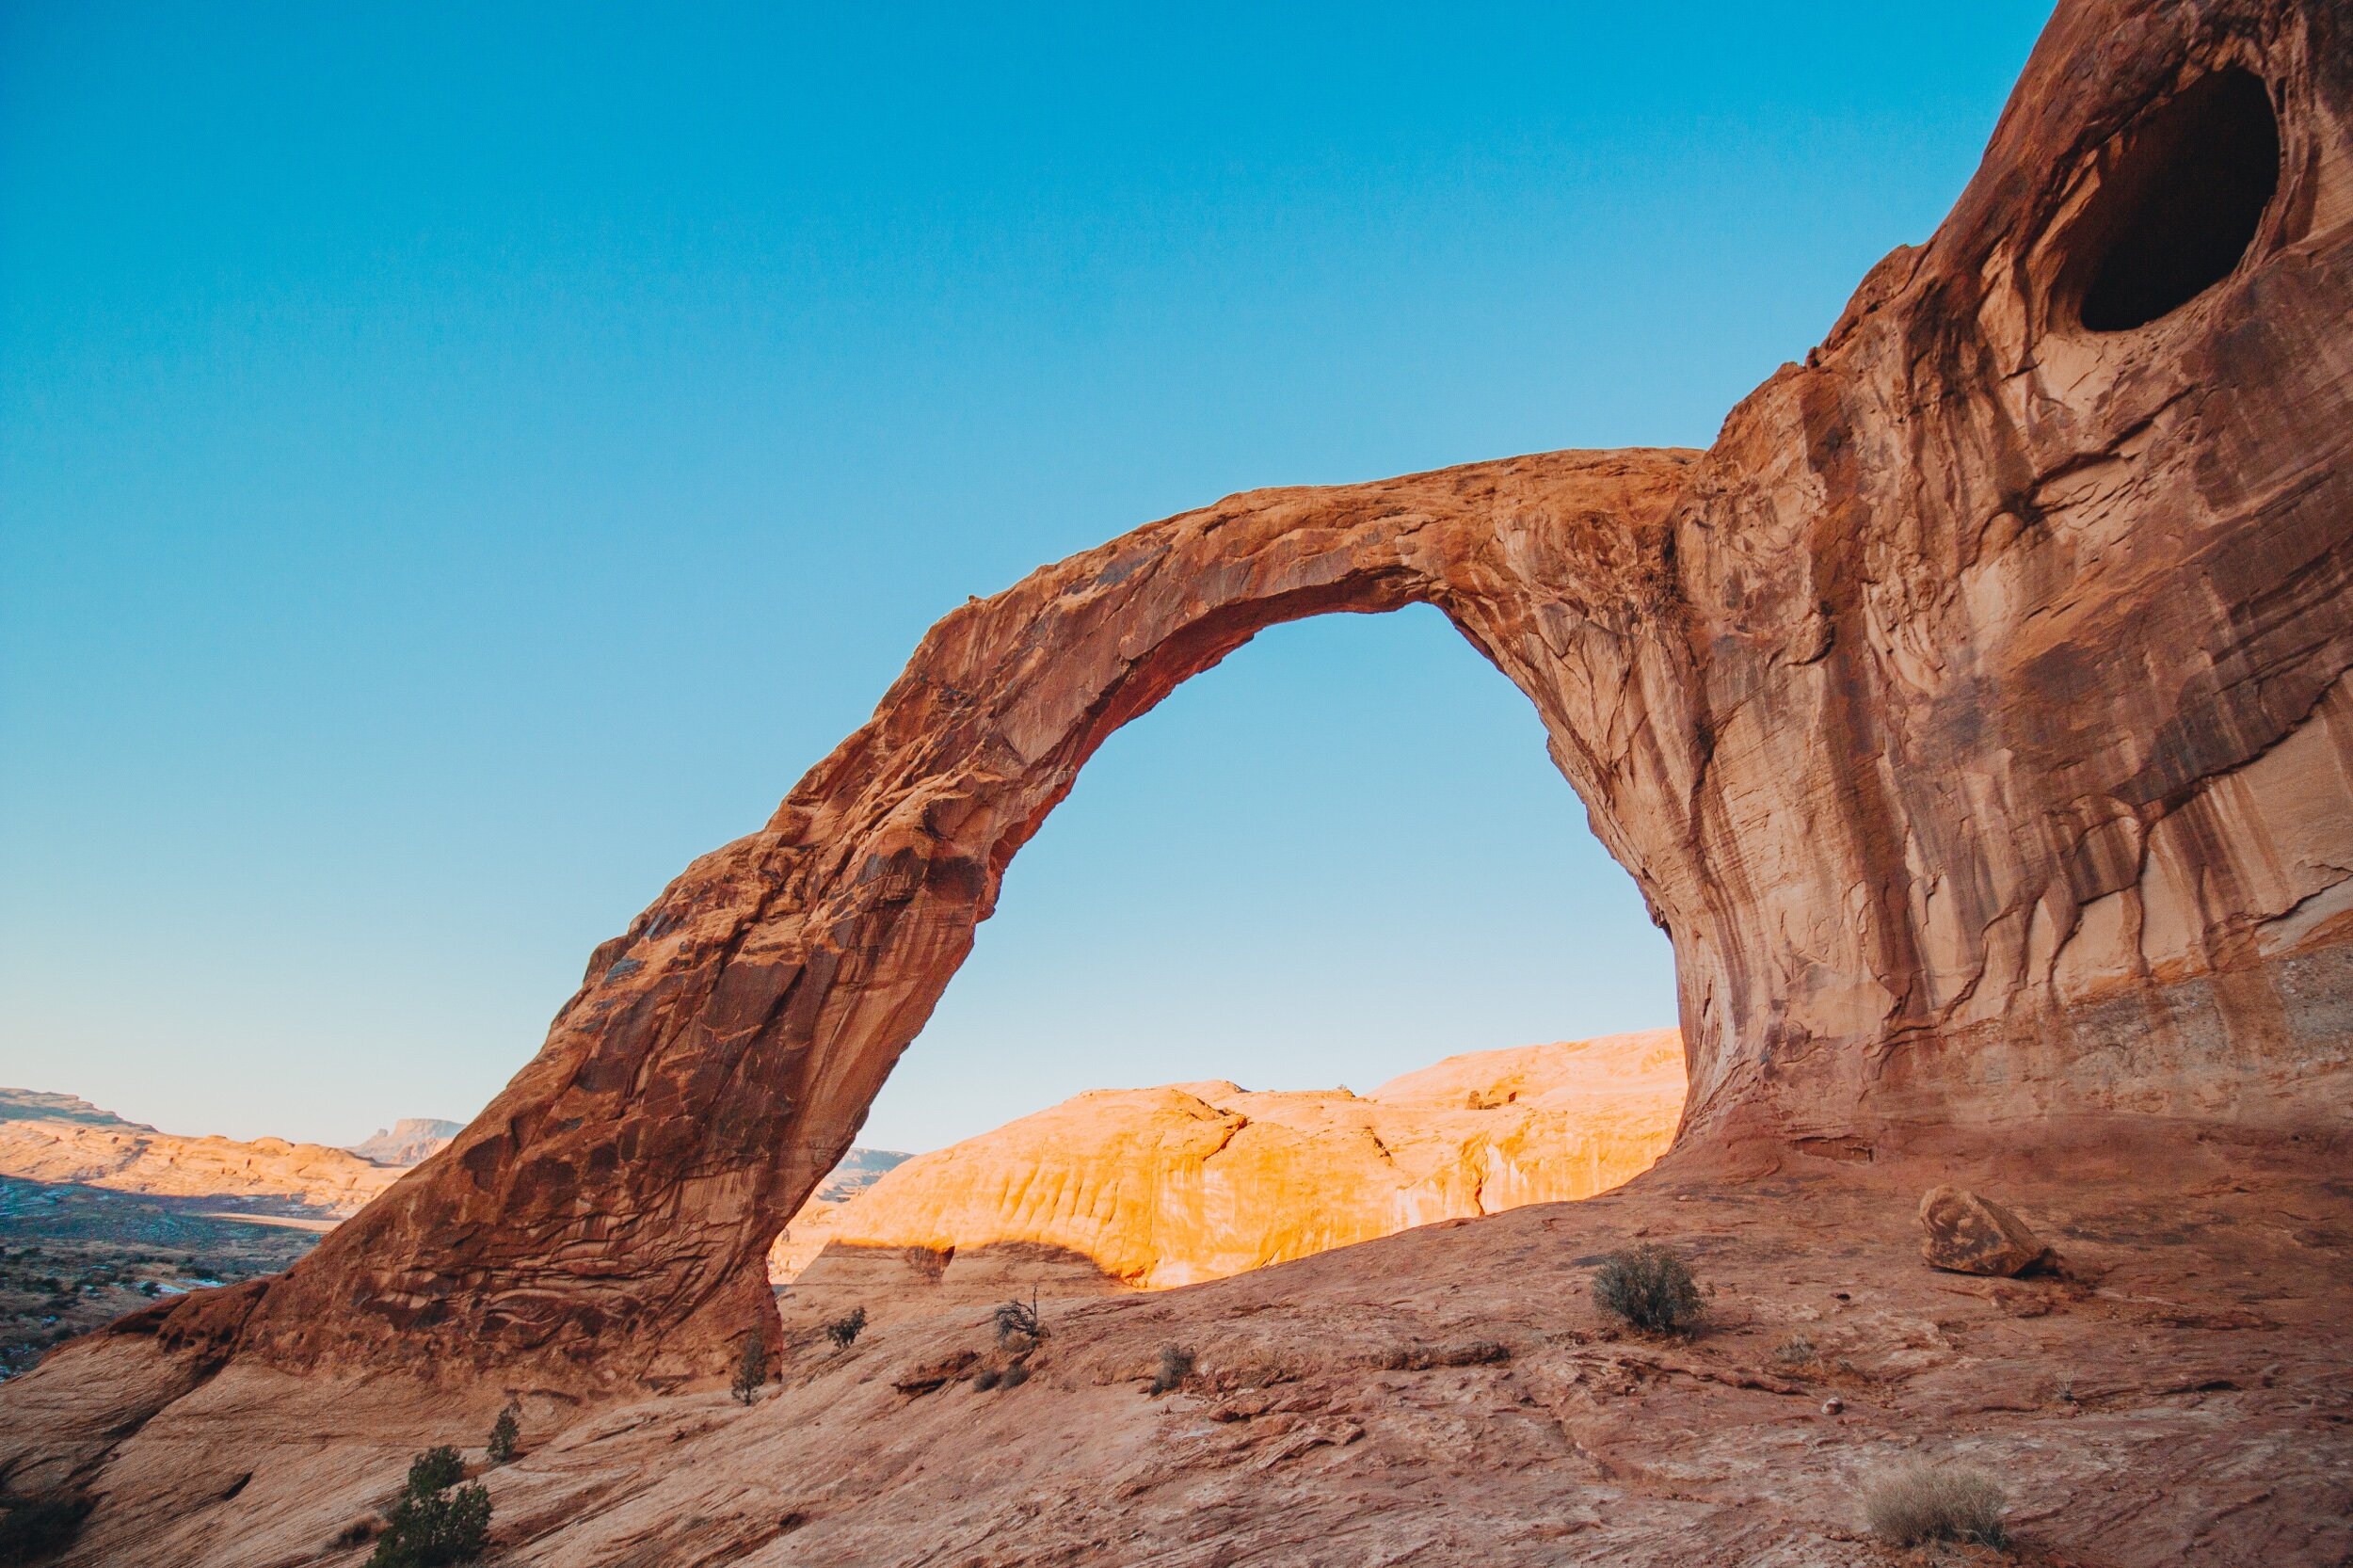
On the last day, we went on another hike near Moab that turned out to be my favorite hike! The trailhead was about 35 minutes away from our Airbnb and since we went on another weekday morning, we ran into even fewer people than the Mills Creek Trail. This hike is described as having a “climbing” section however it is really easy to do. There are spots worn down into the rock for your feet as well as a metal rope on the left side to help you pull yourself up. A little while after this section, there is a short ladder which is the extent of any climbing required for this hike. The overall hike ends up being about 2.3 miles and is another out and back trail. While it is impressive to go right up to the arch, it is also really tall so the best way to get a photo with it is from a distance. On our way back to our car, we stopped which is how I was able to get the photo of the Corona Arch in the distance.
You can view the AllTrails page for this hike here

CanYOnland National park
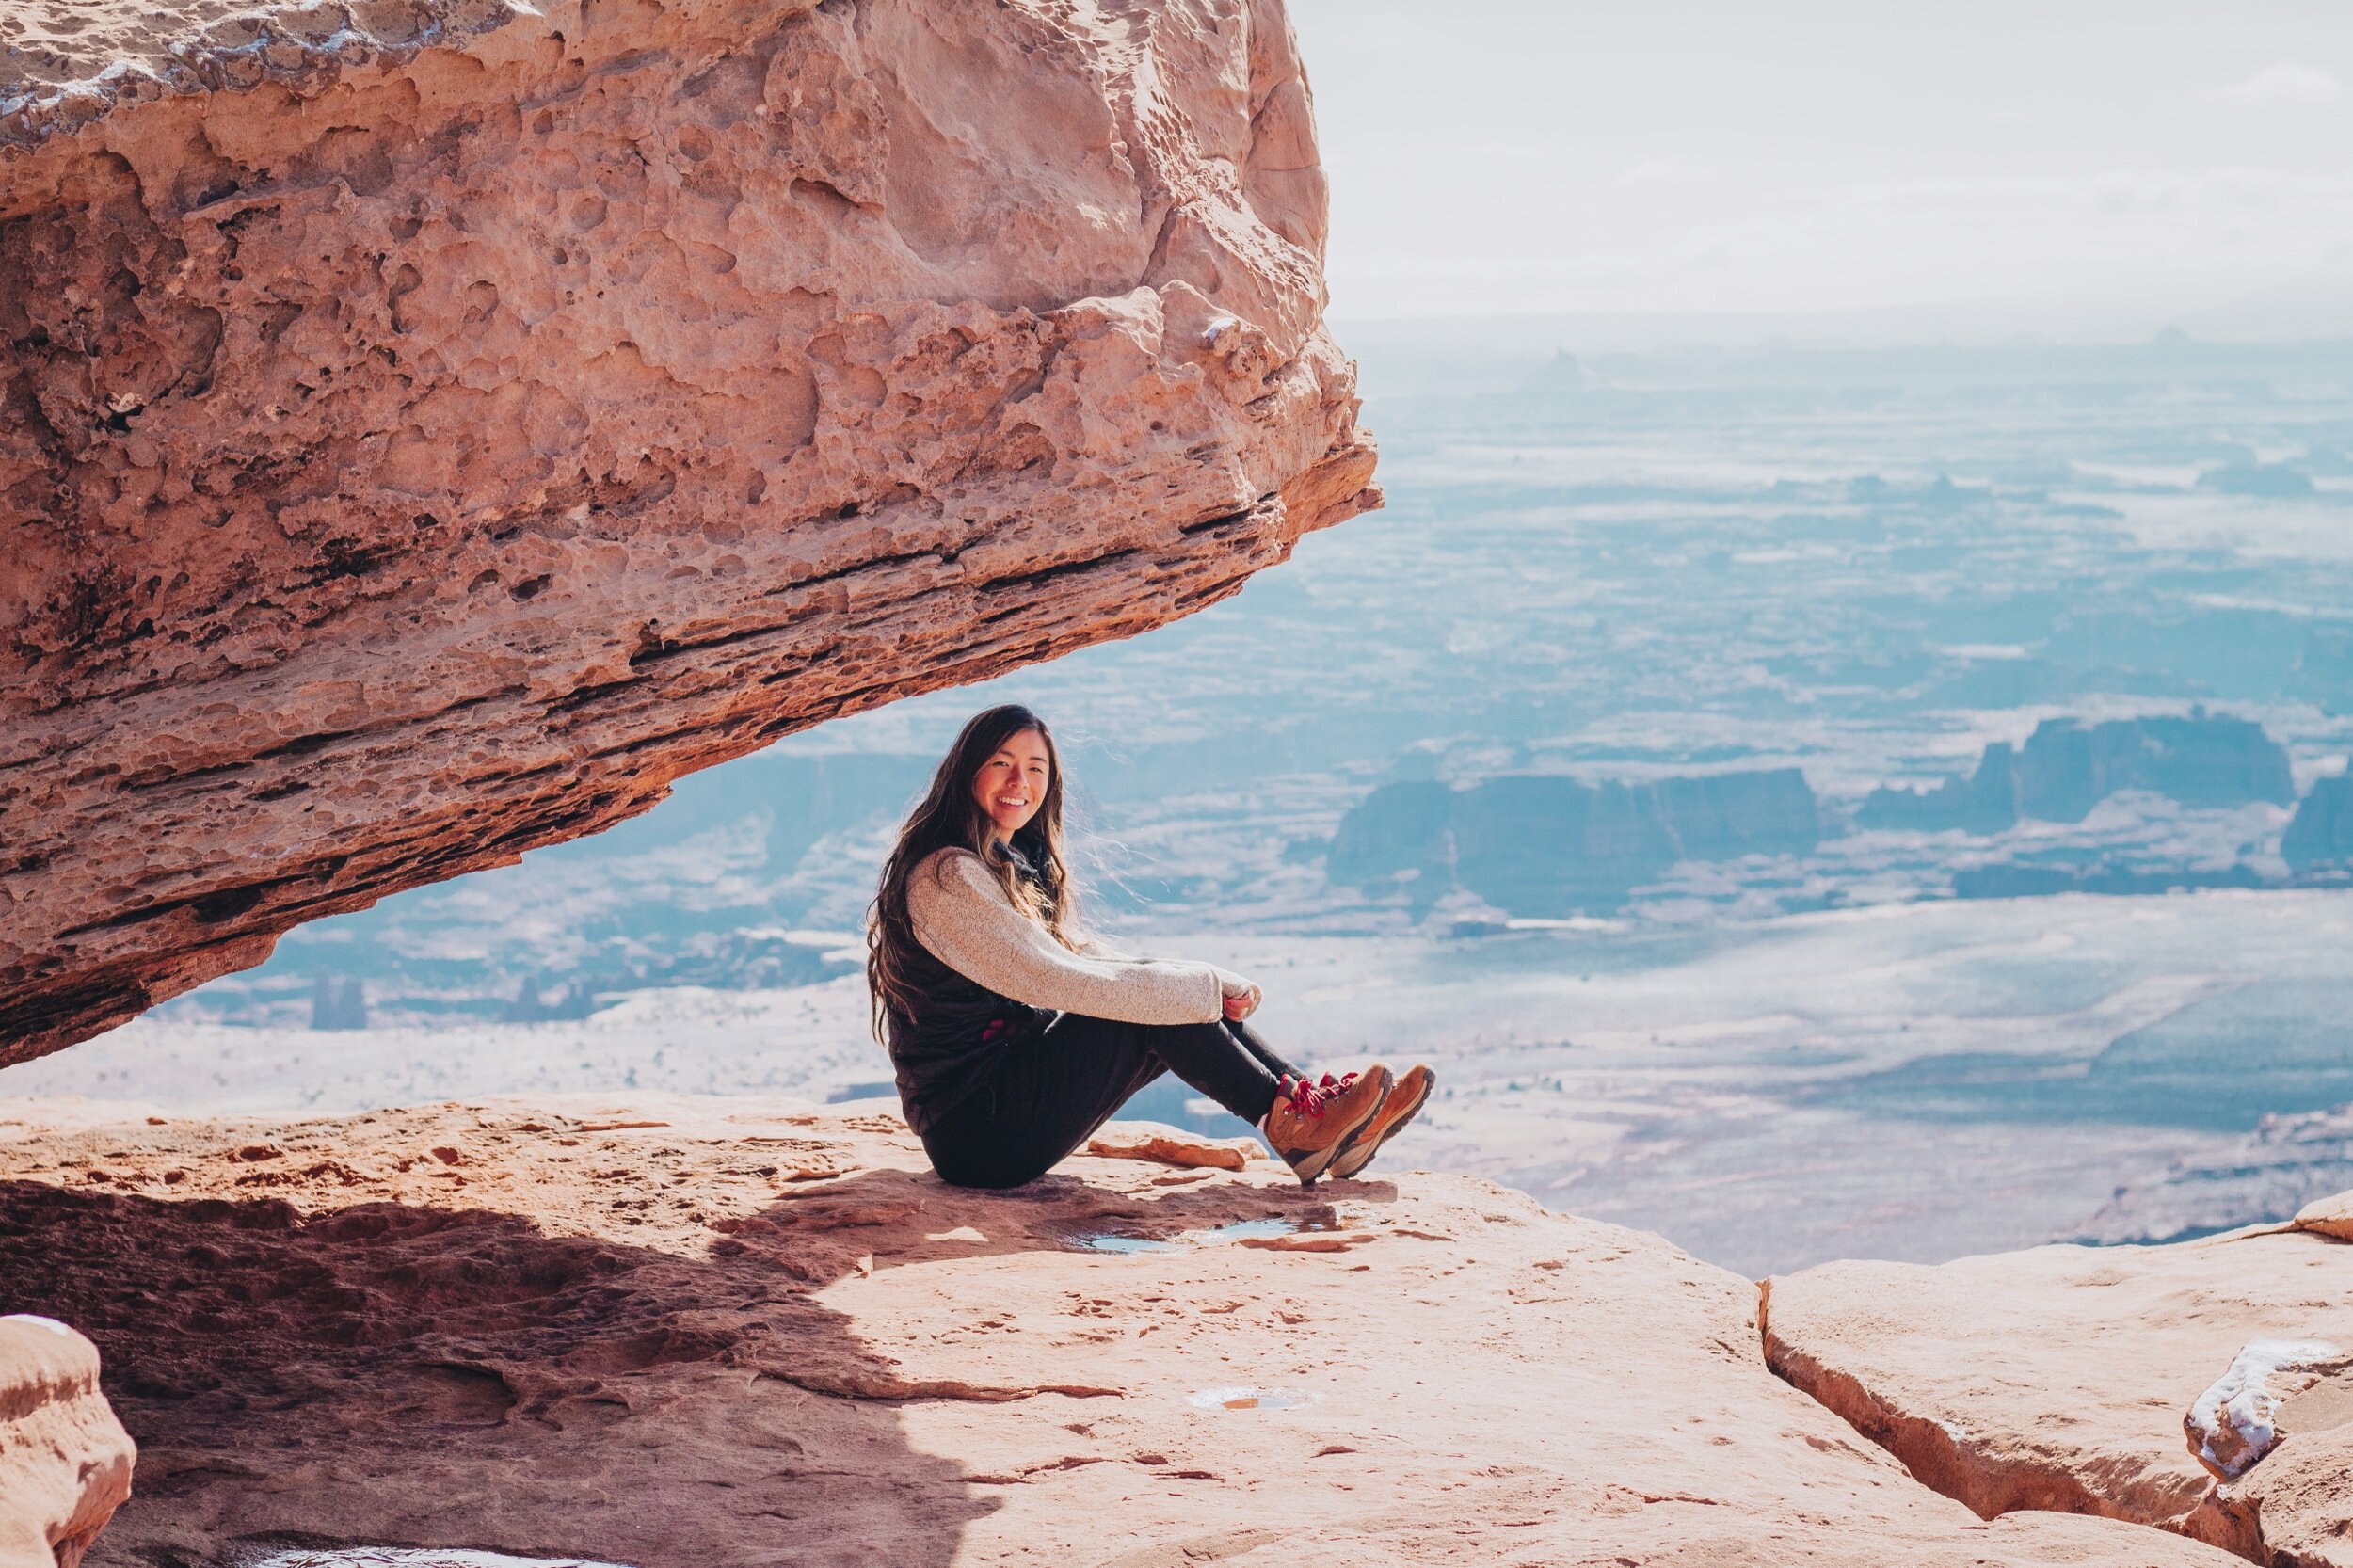
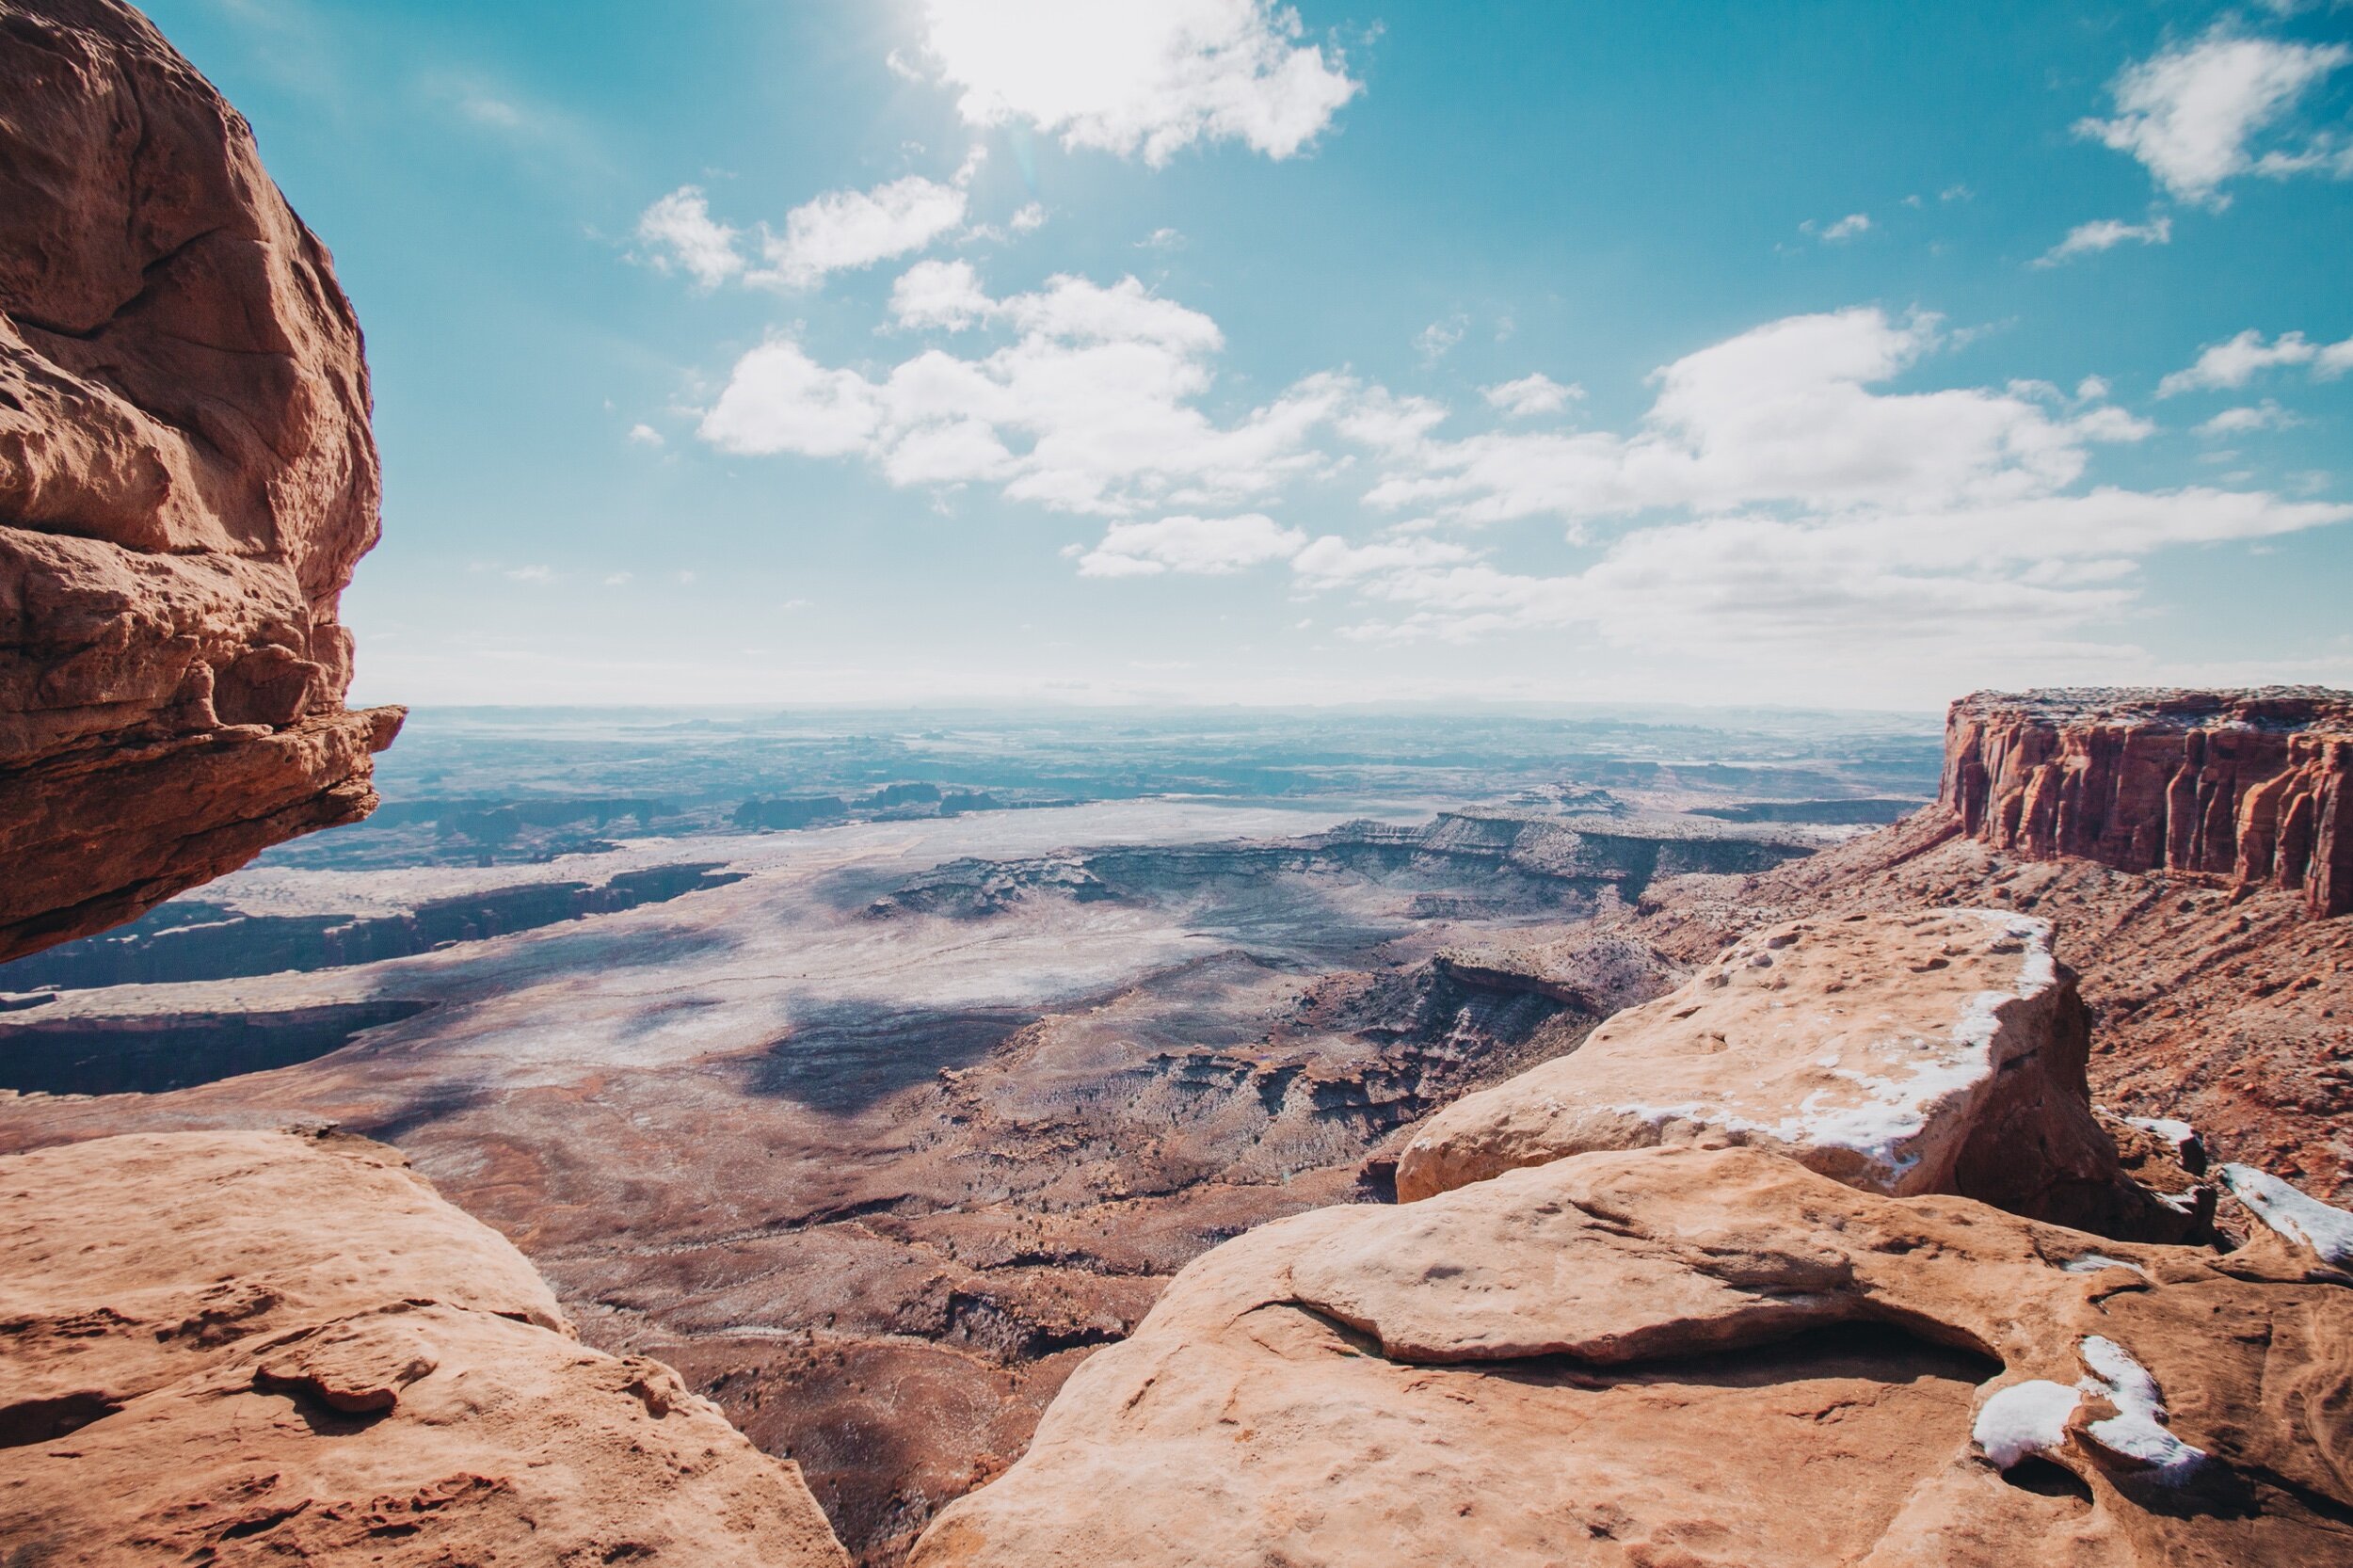
Mesa Arch

When looking up places to see in Canyonlands, everyone suggested Mesa Arch and to go at sunrise. Our first day in Moab, we woke up early and drove the 40ish minutes to the Mesa Arch trailhead. Like many of the hikes we did on our trip, this one was pretty short. While AllTrails describes this trail to be a 0.7 miles loop, we did this trail as an out and back trail. The night before is when it snow and the temperature was still below freezing when we woke up that morning so there was a lot of snow and ice on the ground. Be very careful as almost all of us slipped and fell at one point or another. When we got there, there were a TON of photographers already there setting up their tripods and waiting for the sun to rise. The photographers that come to this spot are very serious and determined about getting their photo and would yell at anyone who got in their way. I would suggest finding alternative views of the arch by either climbing up to the right or left. You can see a pretty great view if you go to the right of the arch but my favorite spot was to the left (as seen in my photo). If you keep walking for awhile, you can view the whole canyon and the backside of the arch which was so pretty especially with the snow and as the sun started to hit the canyon. Once the sun started to rise, the crowd of people started to clear out a little and I was able to sneak in briefly to get a photo of the sun peaking through.
You can view the AllTrails page for this hike here

Murphy Point Trail
The second hike we did after Mesa Arch was Murphy Point Trail. This was possibly the longest hike we went on our whole trip but it was only 3.4 miles round trip and it is another out and back trail. To be honest, if you were going to cut out a hike at Canyonlands, I would cut this one out. While it was pretty, you get a similar view of the canyons from the Grand View Point hike. While AllTrails describes this as being a heavily trafficked trail, there was absolutely no one else when we went. I do think this was due to the it being an early weekday morning and the snow and ice on the ground.
You can view the AllTrails page for this hike here
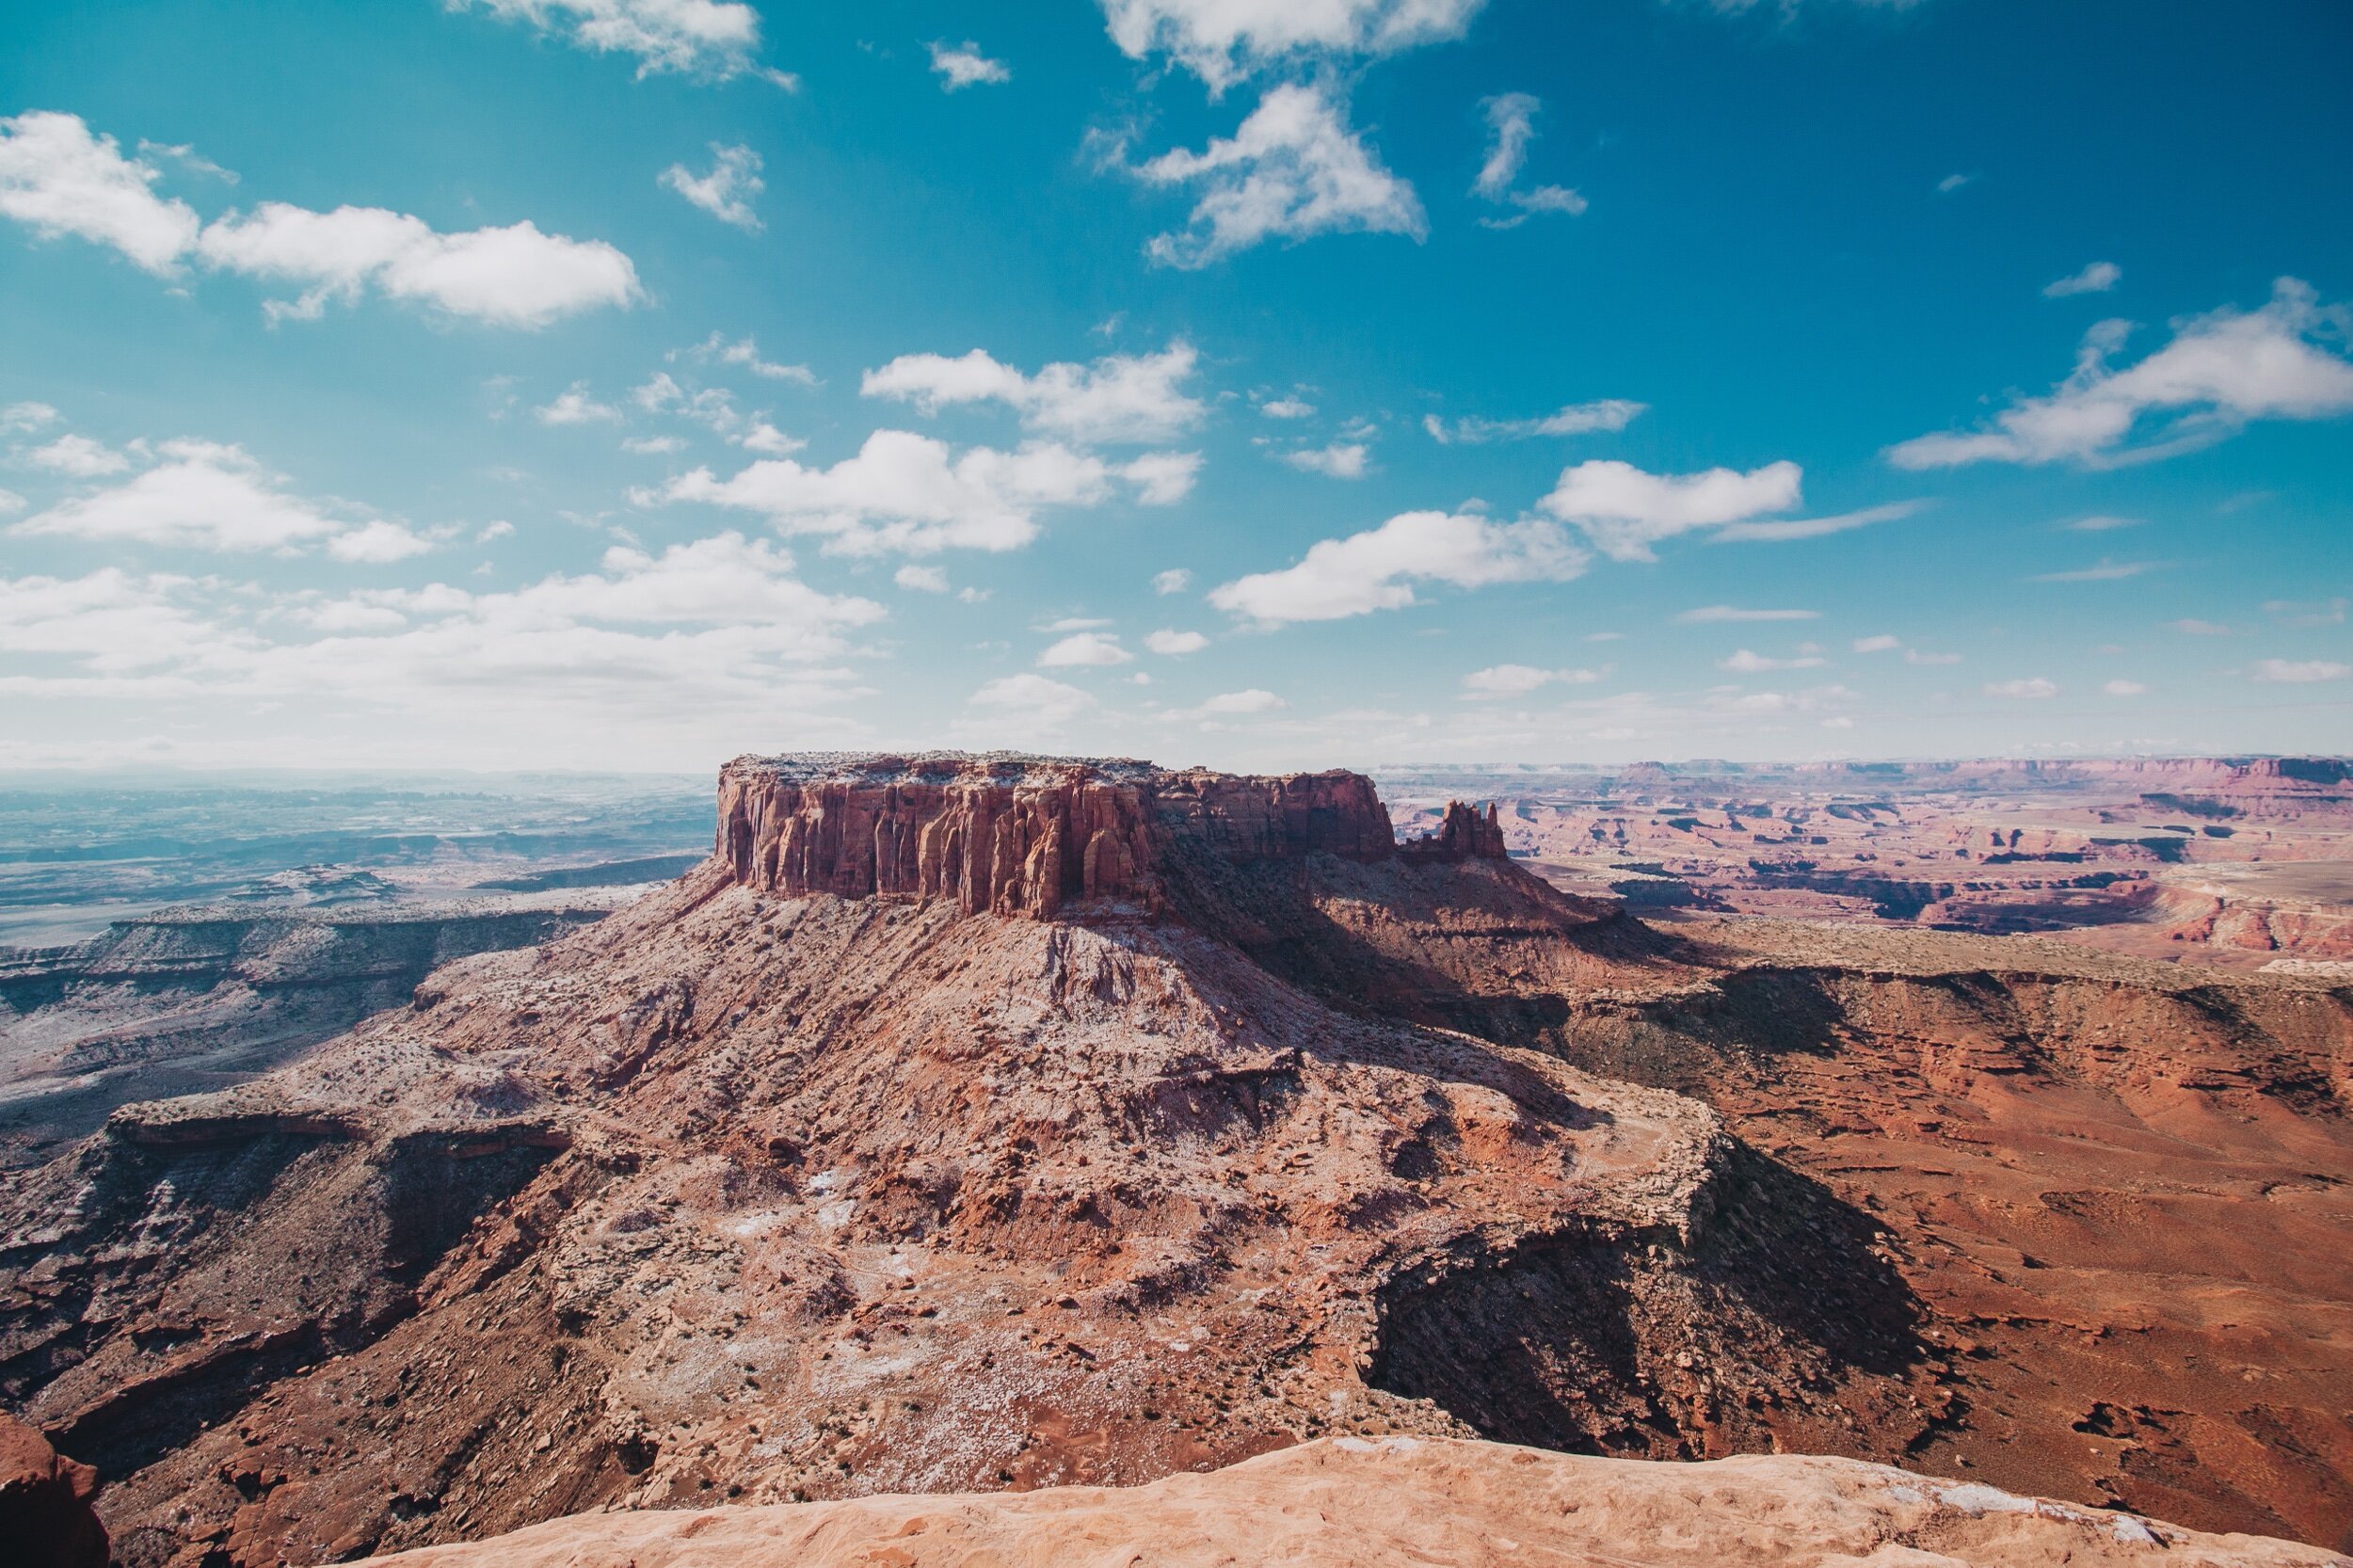
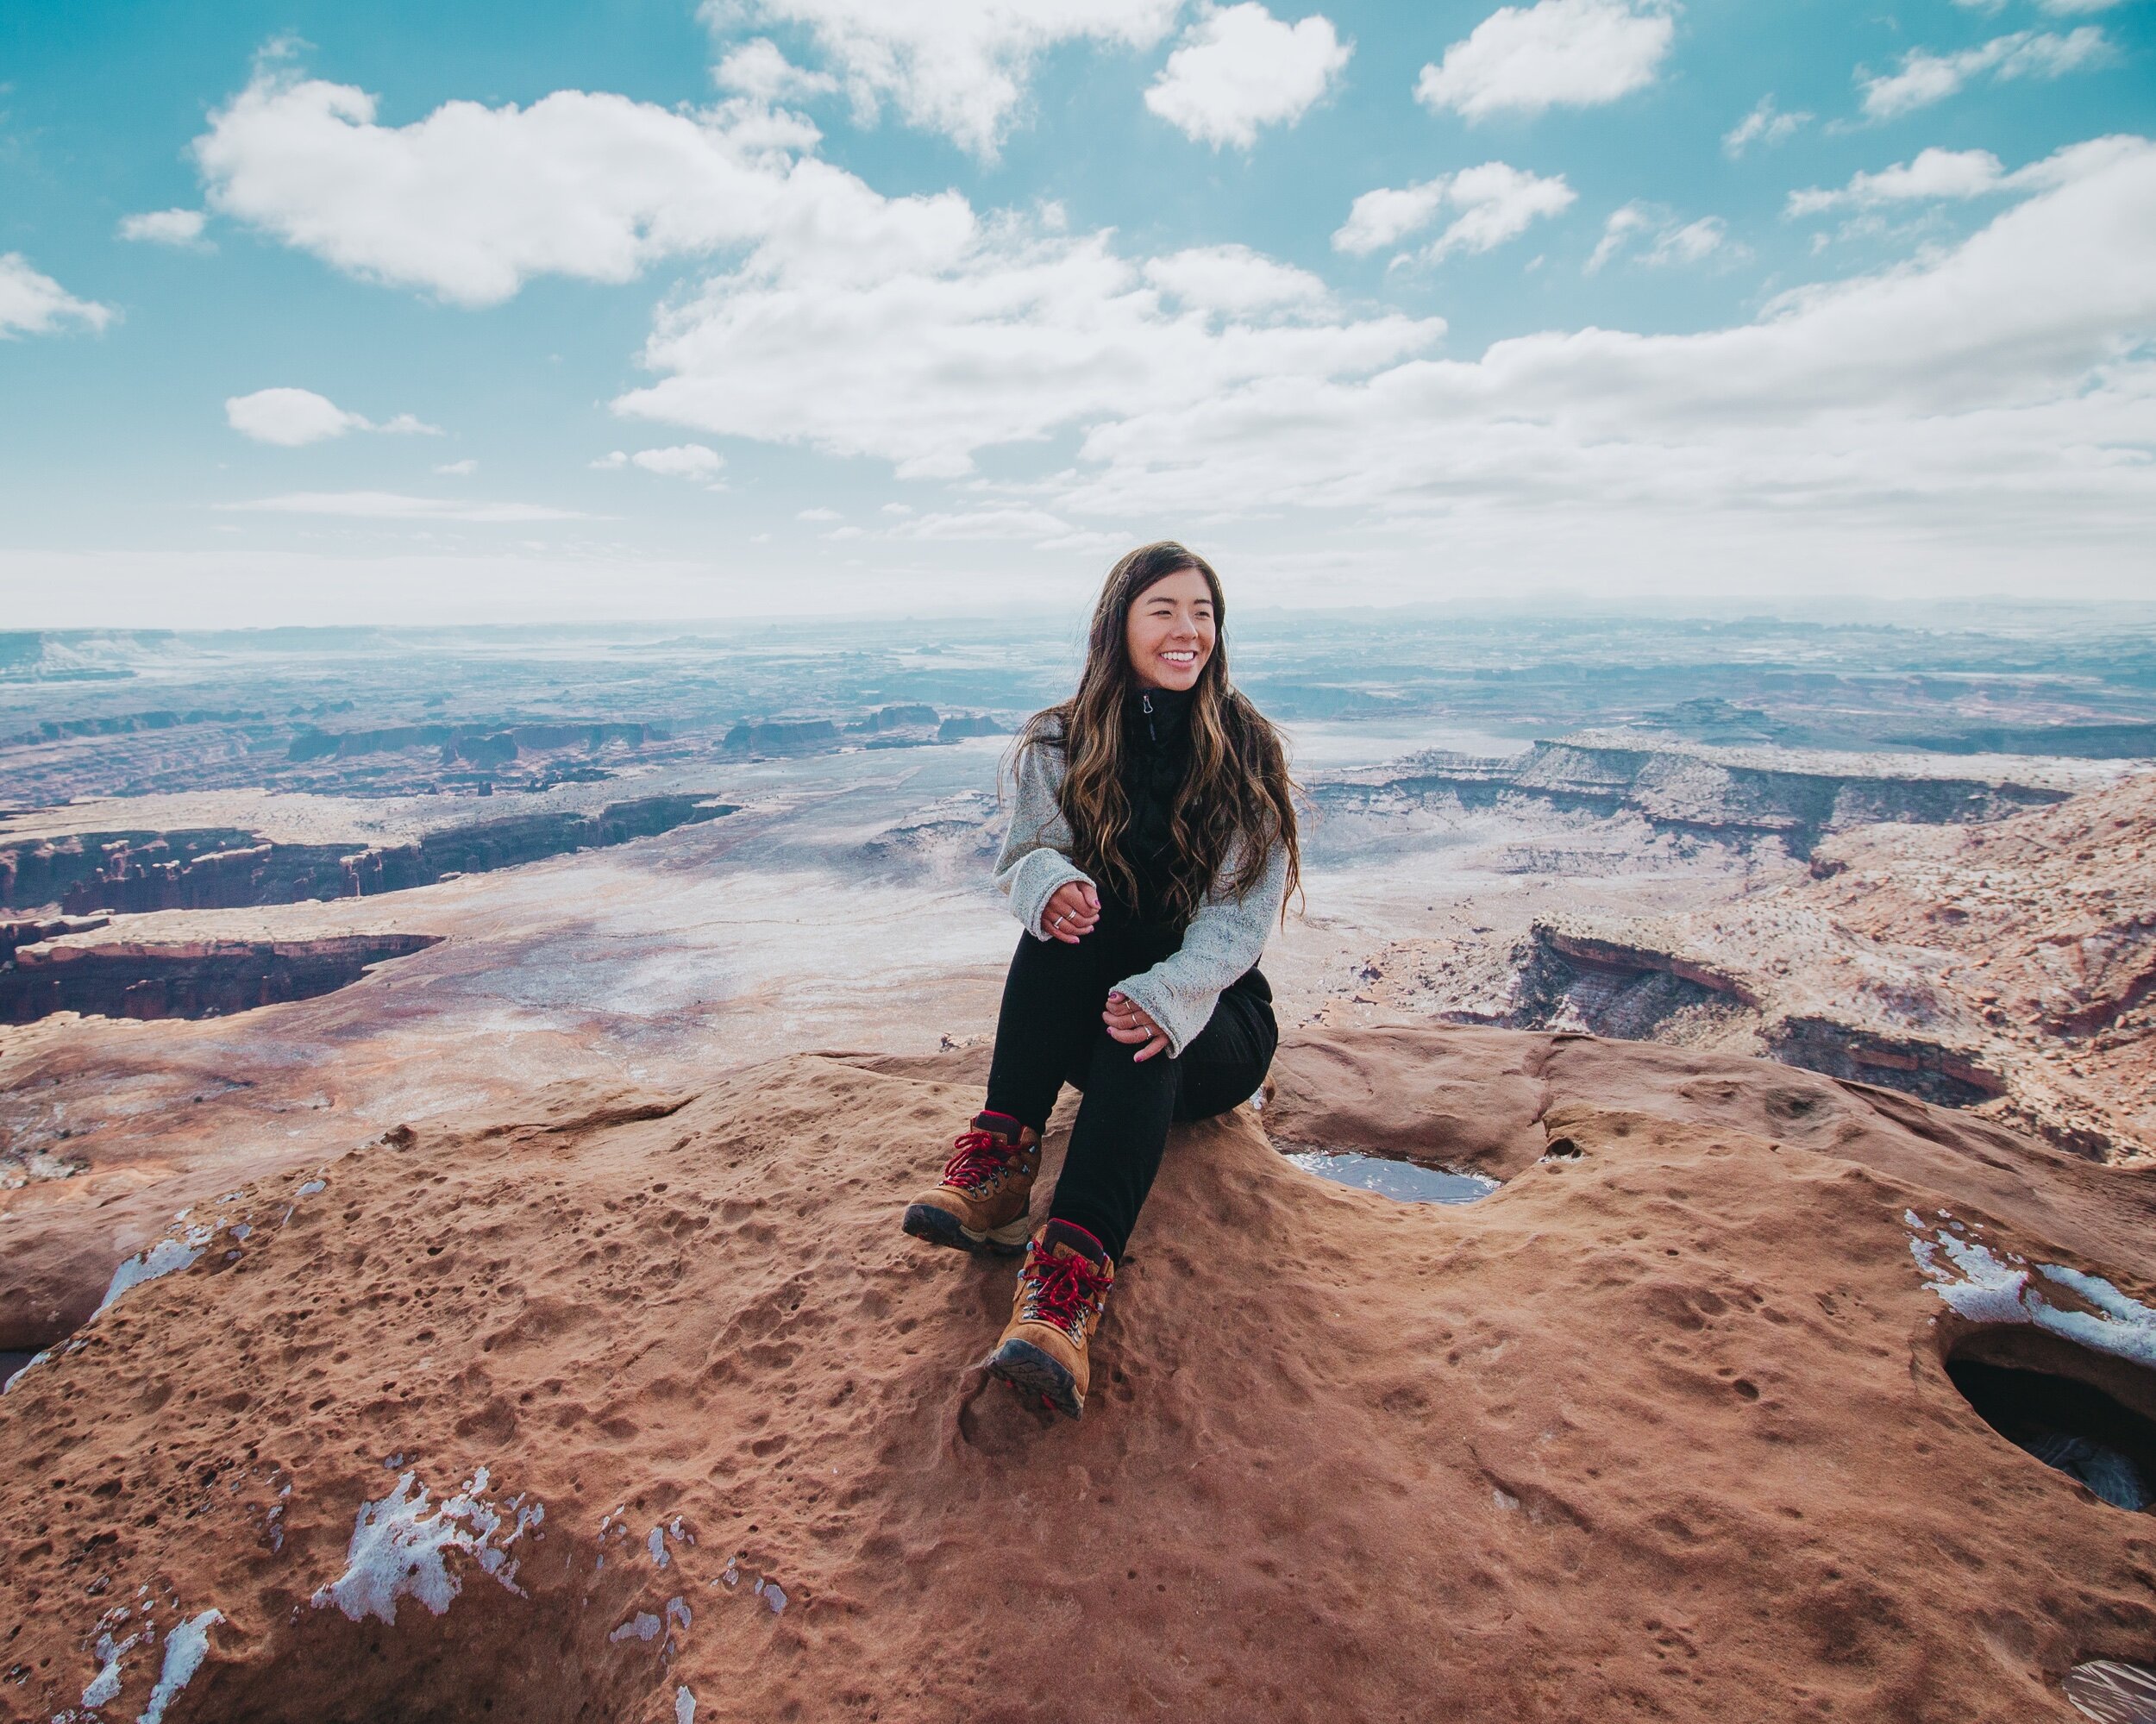
Grand View Point Overlook
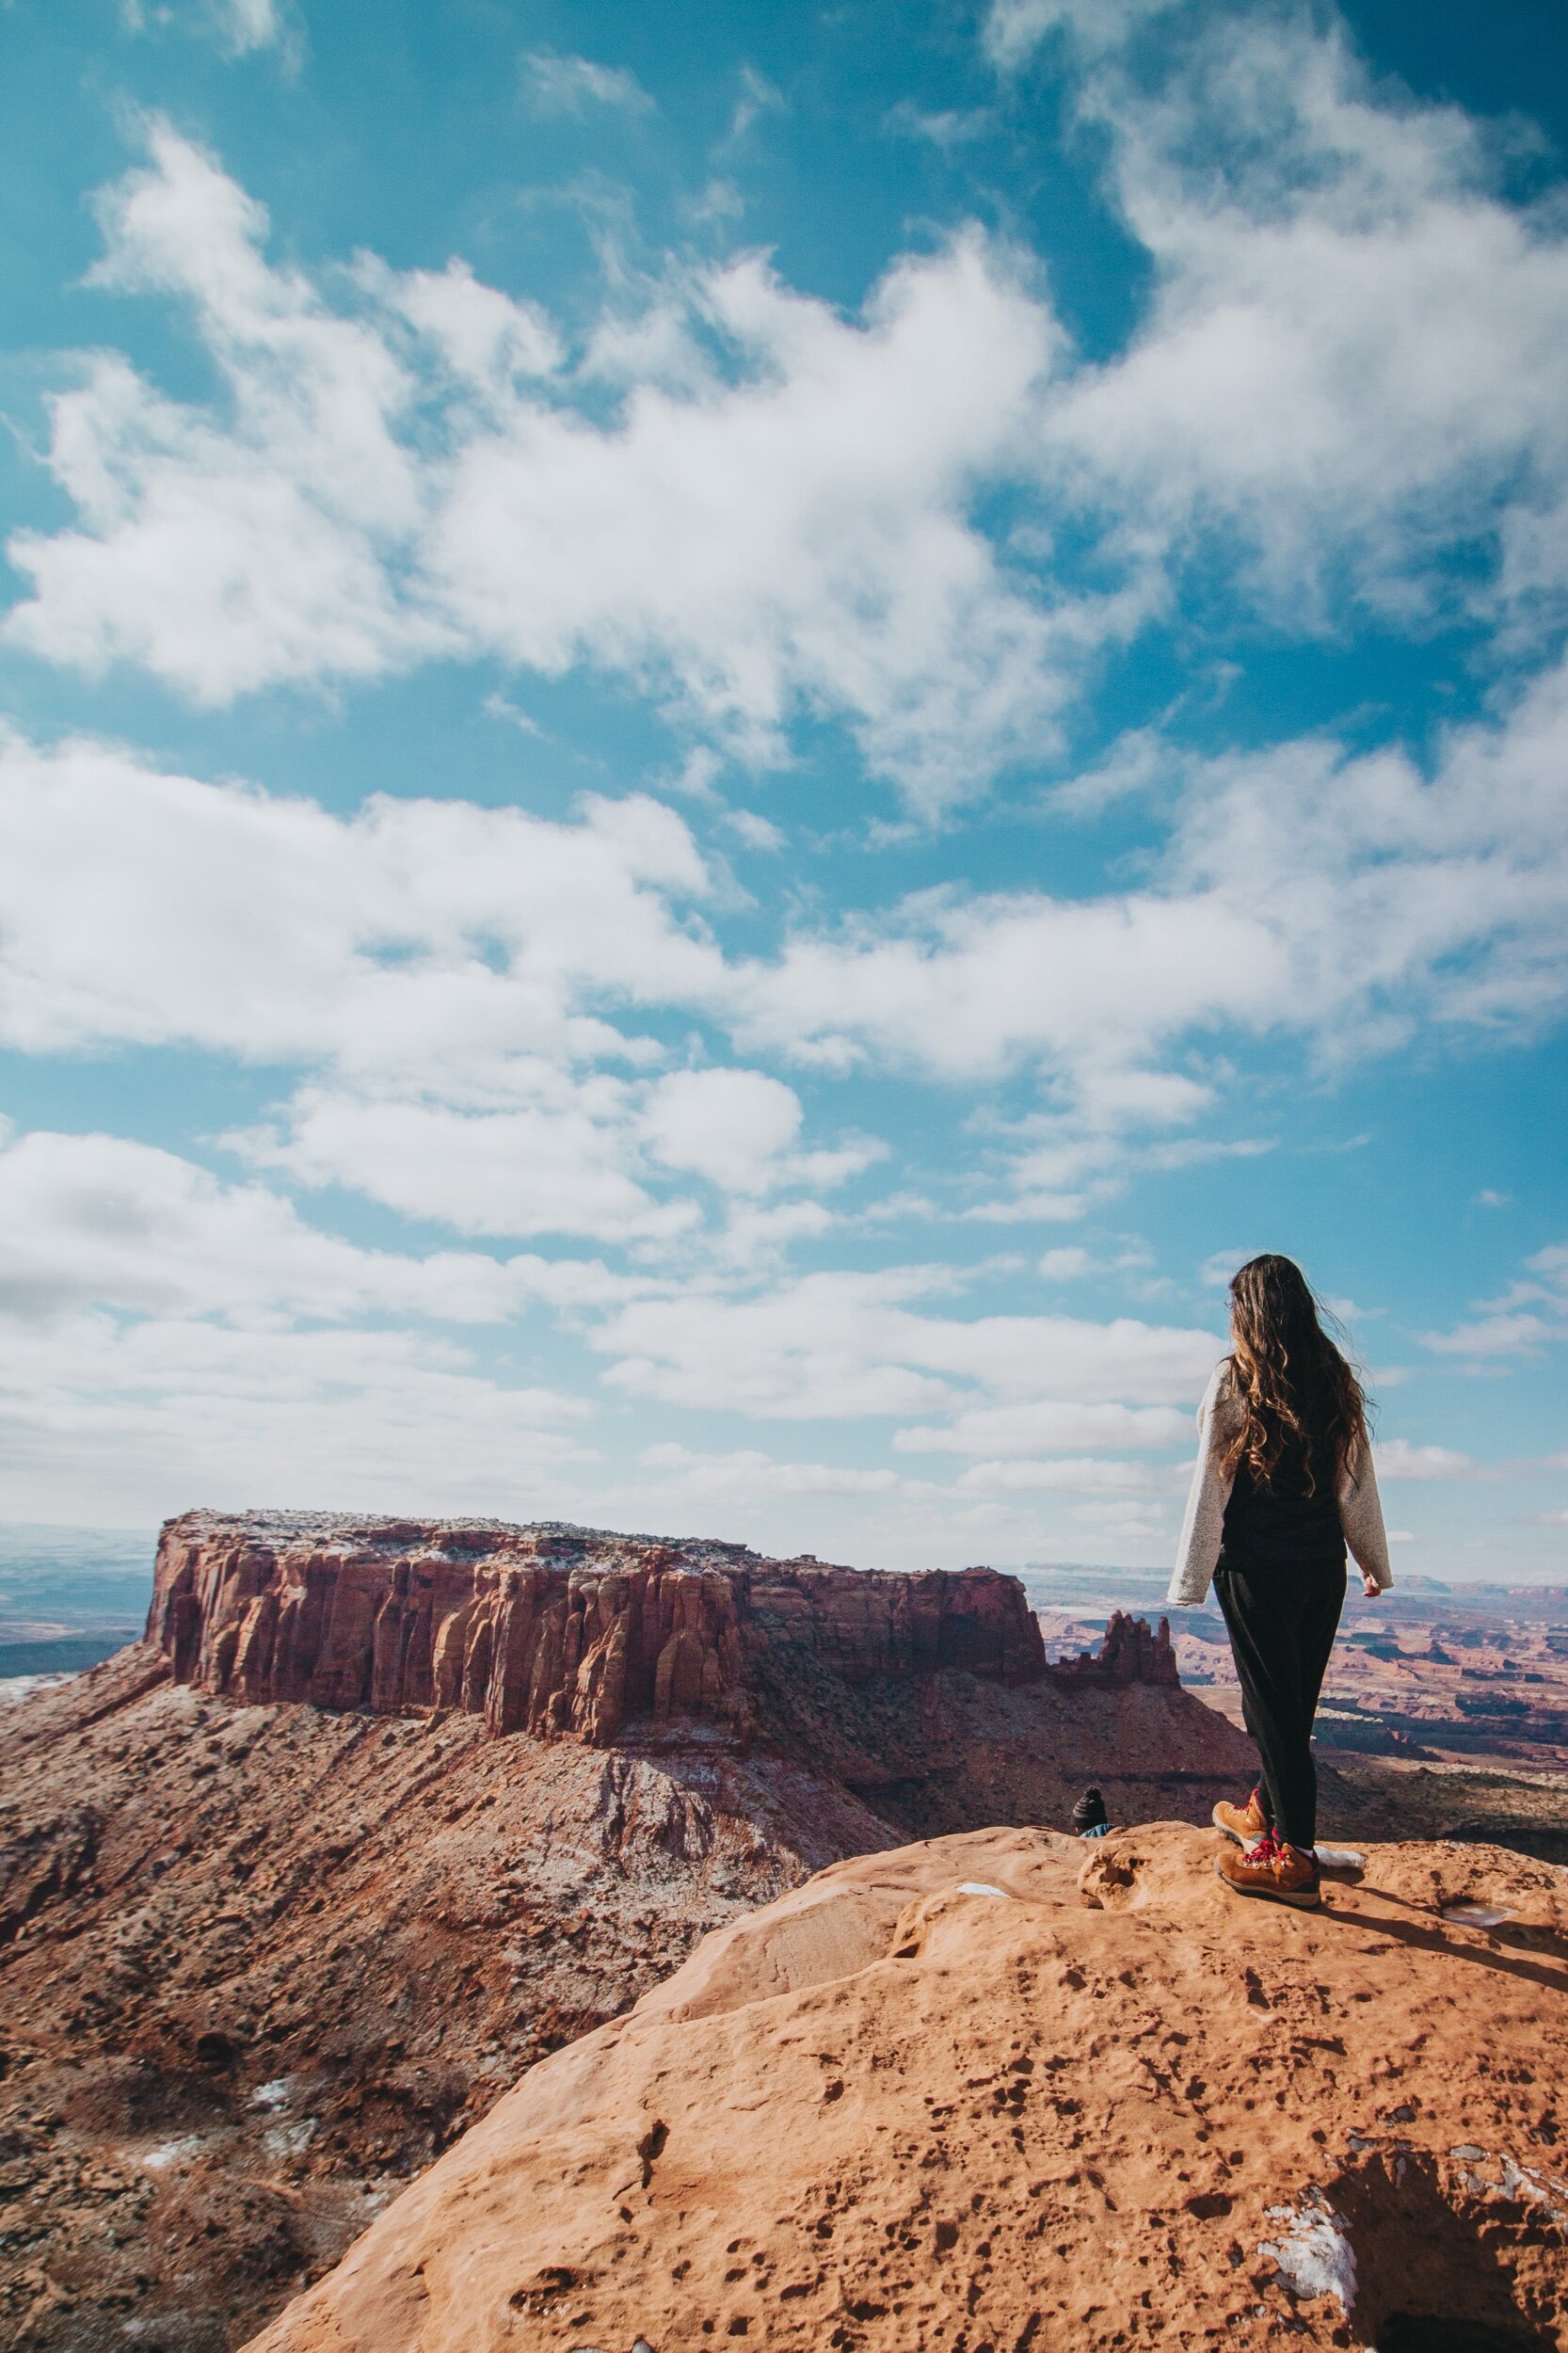
The last hike we did in Canyonlands was Grand View Point Overlook which had great views of the surrounding canyons! The bridge to the beginning on the hike was pretty slippery and covered with ice however the rest of the hike was pretty easy. The total hike is about 1.8 miles out and back and has a great spot at the end to stop and eat a snack. There is also a large rock at the end of the trail that many people were climbing on top for an even better view. If you only have one day in Canyonlands like we did, I would recommend going on this hike as it gives you a great overview of the park. We definitely did lose track of the trail markers on our way back which is one thing to keep in mind if you do hike this trail.
You can view the AllTrails page for this hike here
Bonneville Salt Flats


The Bonneville Salt Flats were one of the places I had been looking forward to seeing the most! While these are not near Moab, they were only a short detour from Salt Lake and are located along the border to Utah and Nevada. The Salt Flats are open to the public almost all year round and there is no fee to see them so I definitely recommend making the trip if you have time! Apparently in the winter after there has been some rain fall, the water will sit on top of the flats and looks like reflective glass. There is a parking lot/view point for the salt flats and from there you can continue driving on to them as far as you would like. There were a few other groups out there however they continue for miles and miles so it is easy to find a spot that is all your own. Since we stopped on our way back to Boise, it ended up being early afternoon when we got there. If I were to go again, I would recommend visiting around sunrise or sunset since the direct light was pretty harsh and can also get pretty hot during warmer months.
You can read more about the Bonneville Salt Flats here
Looking back on this trip, I know it will be one I remember forever. All the places we saw were so unique and a great reminder of how lucky we are to be surrounded by such beautiful land formations. I still have the other three Utah parks on my bucketlist so I know I’ll be back to this area hopefully sooner rather than later! The same natural forces that create all of the arches, will eventually destroy them as well. This means that the arches we saw on our trip may be gone any day however there will always be new arches being formed for years to come. Hopefully my experience at all of these spots helps you plan out your trip to Utah! If you have any questions, let me know or if you have been to any other spots around this area, I would love to hear what your favorites were!


